|
|
Post by Itrapny on Nov 1, 2009 16:55:53 GMT -5
Here's a little tutorial, working on a video with the next one  Sorry I didn't get the whole thing from start to finish, started this about half way through...... Working the pelt down through the belly area....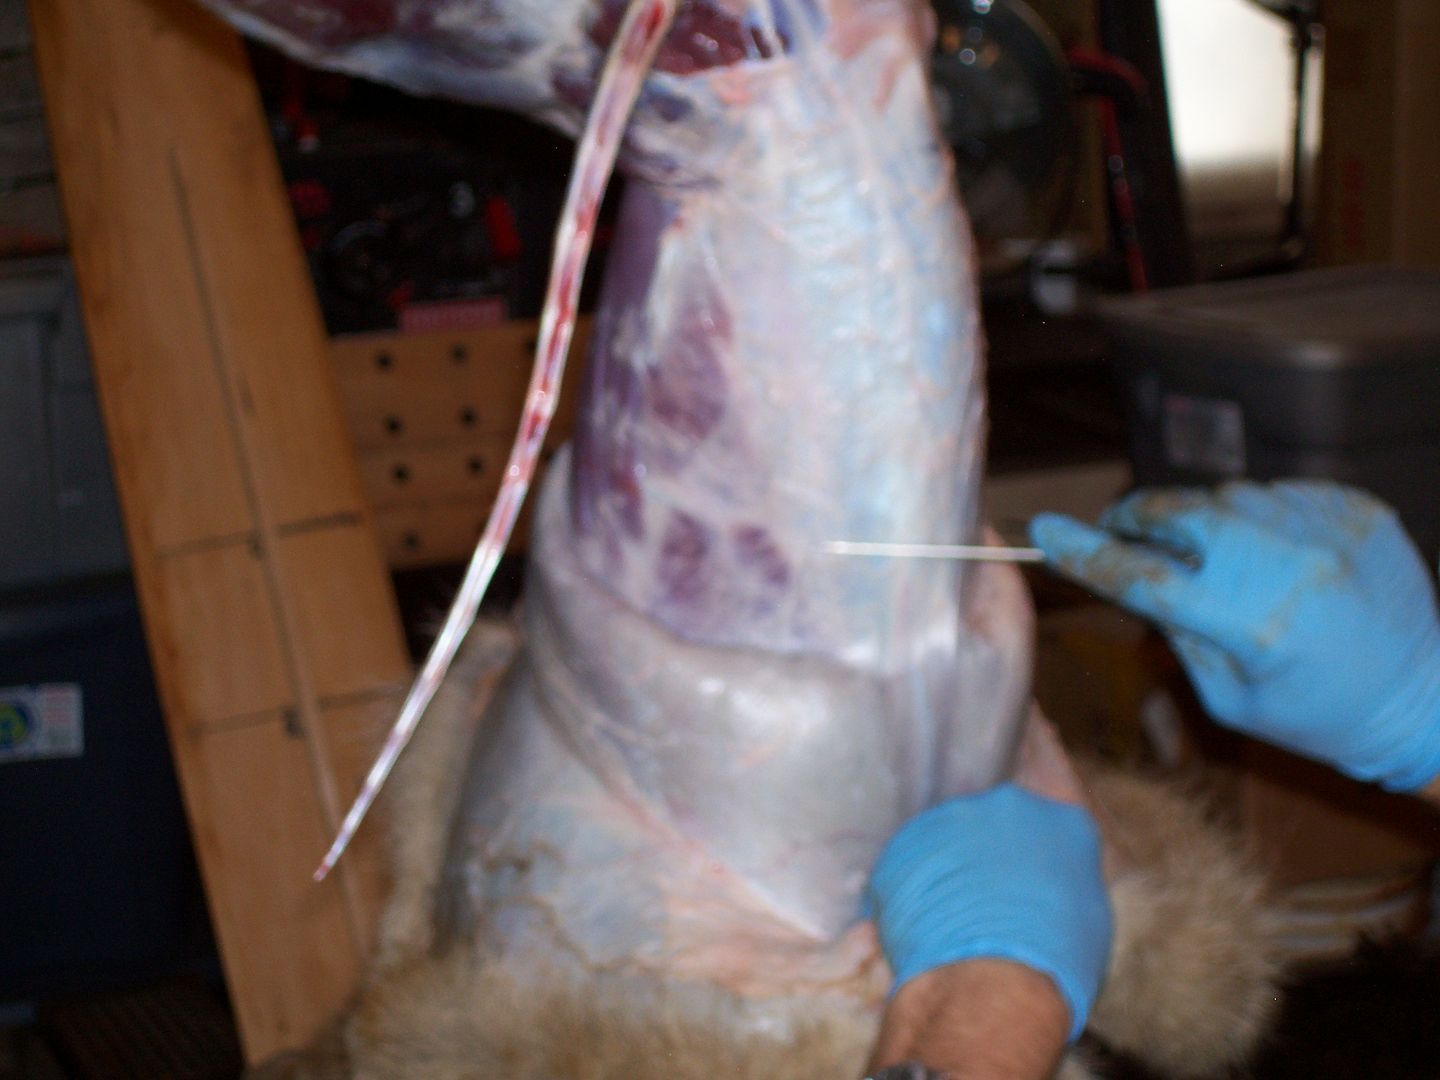 Coming to the front legs.... Coming to the front legs....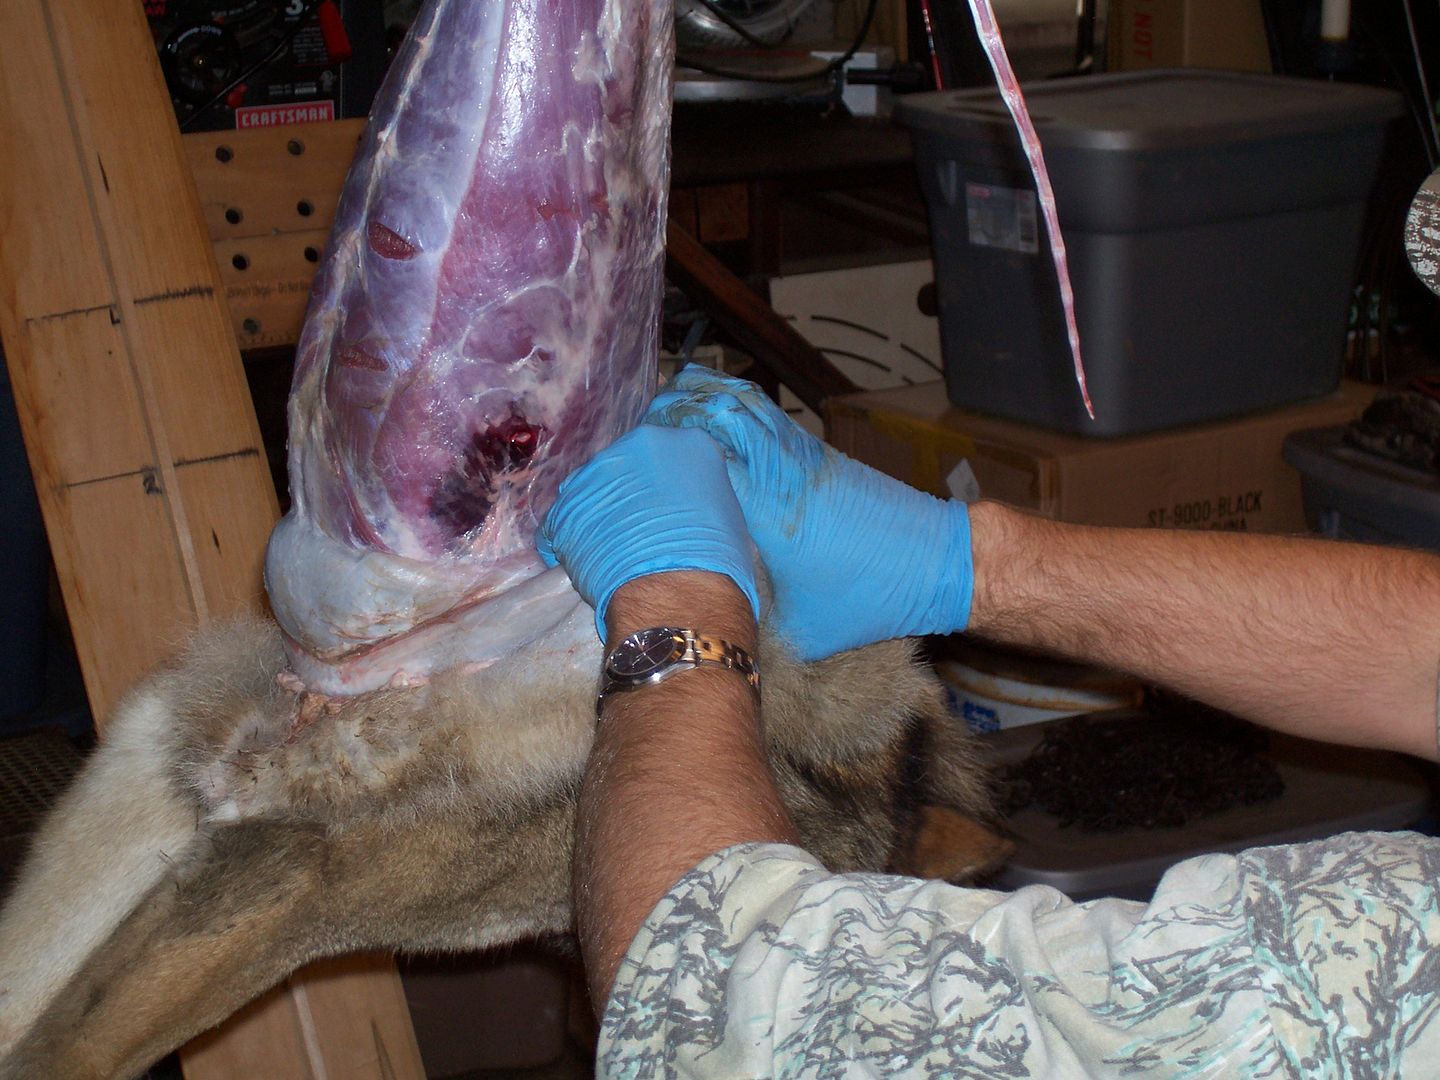 You may need to use a little elbow grease here... You may need to use a little elbow grease here...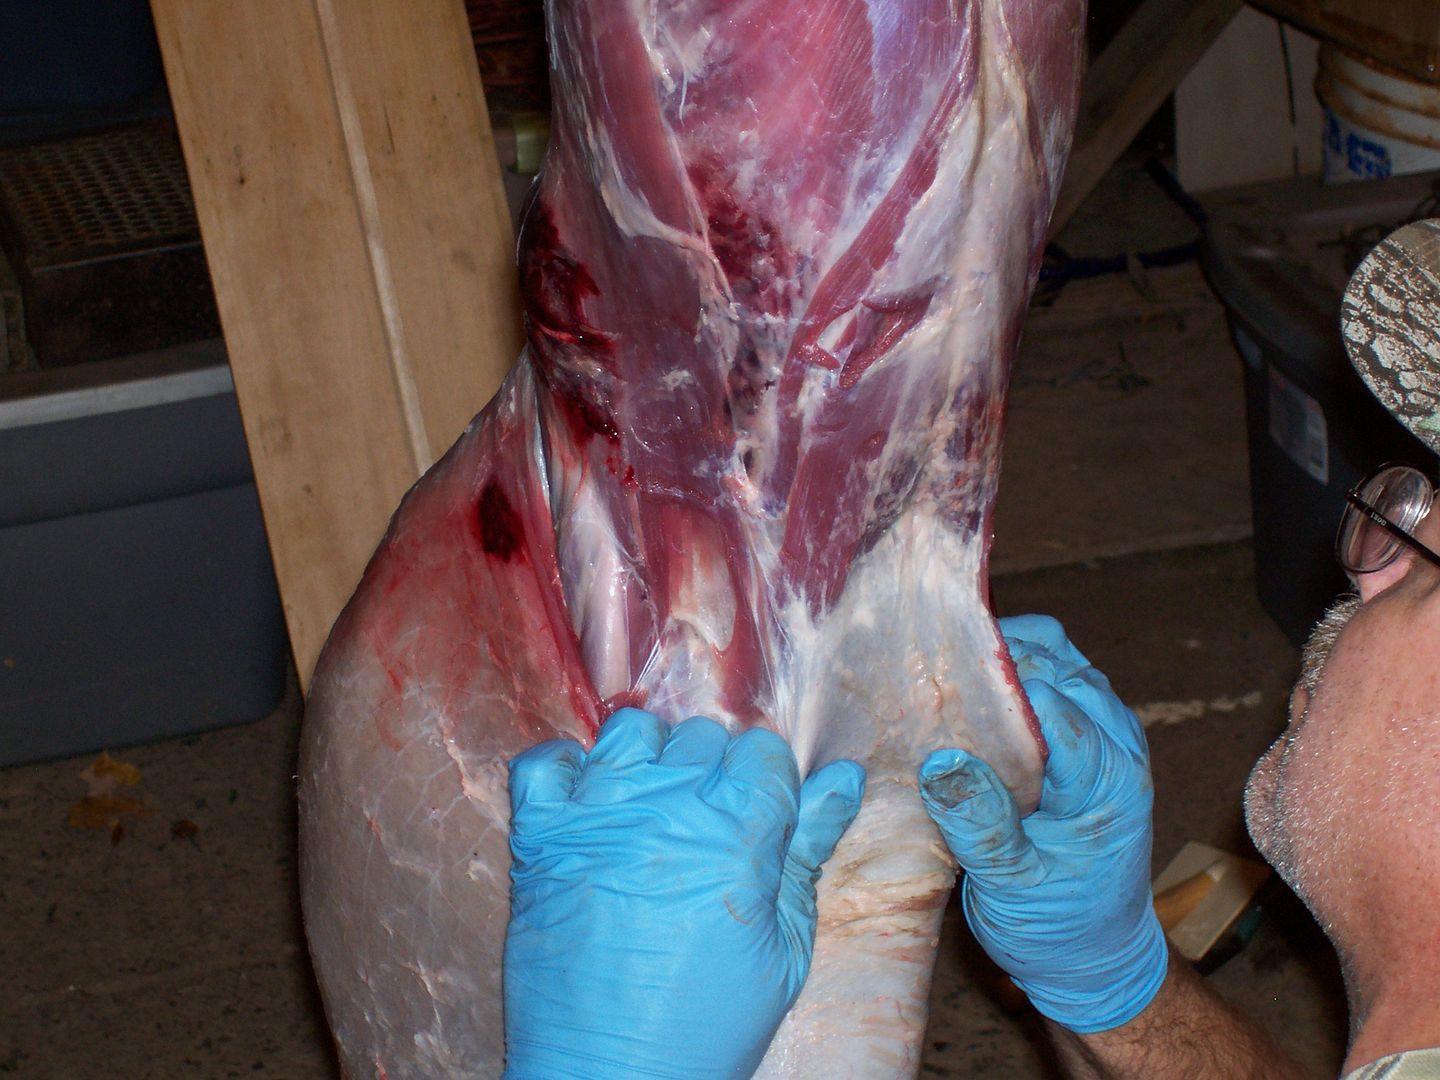
You'll need to use your knife here, be careful not to cut the pelt.... 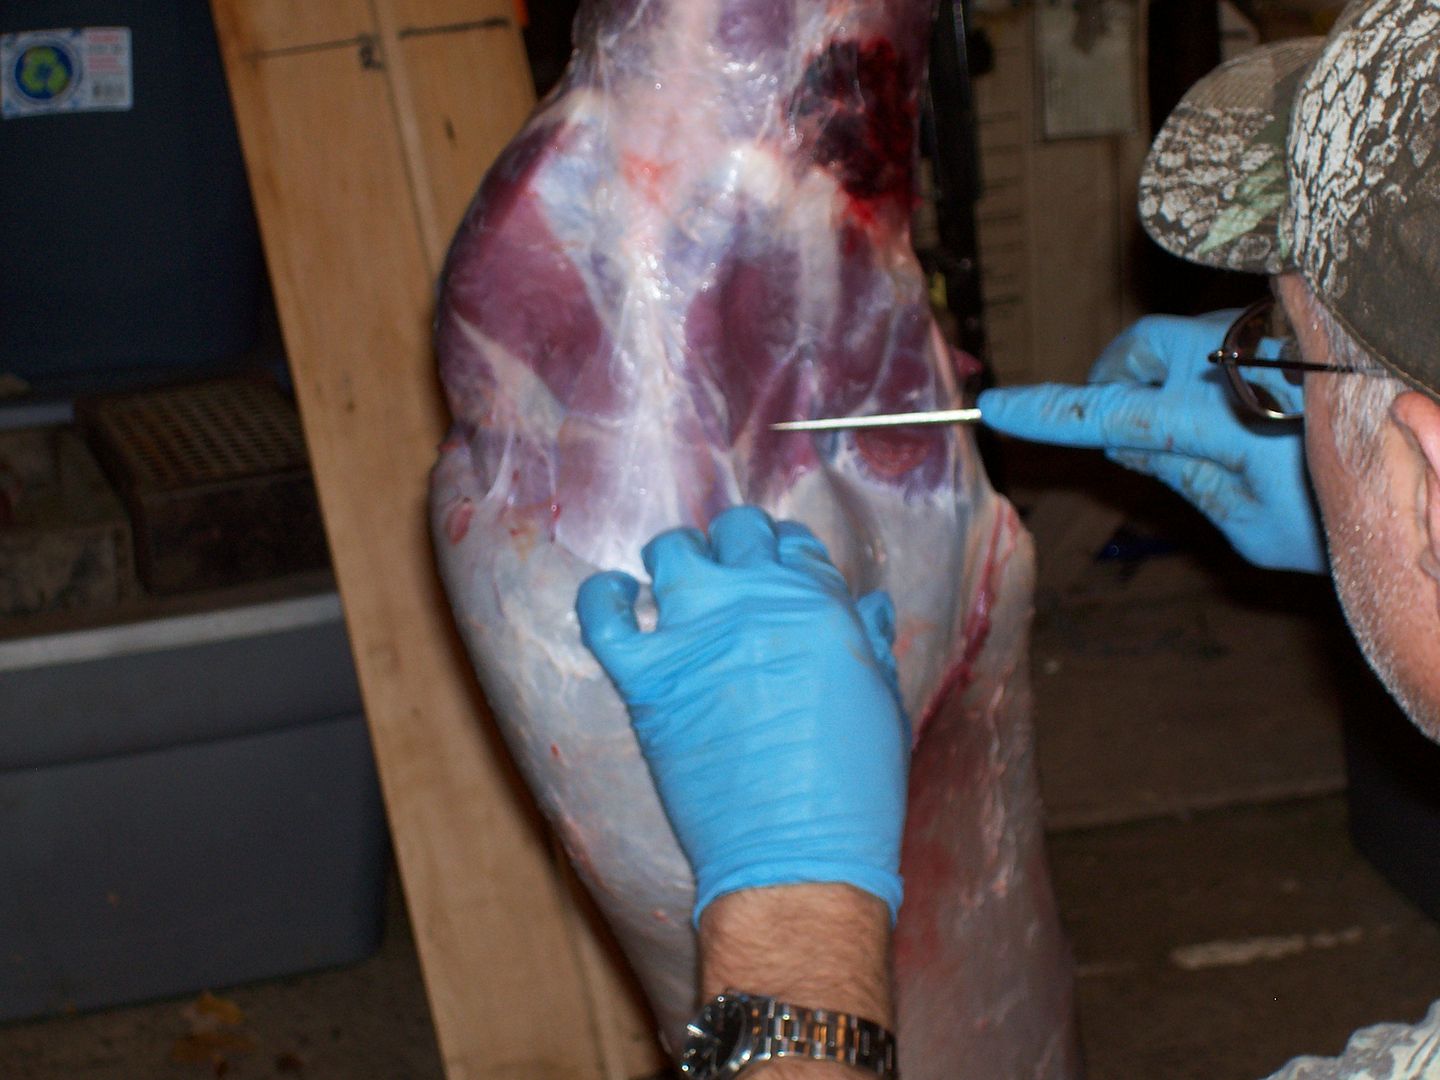
Work you fingers in behind the front leg...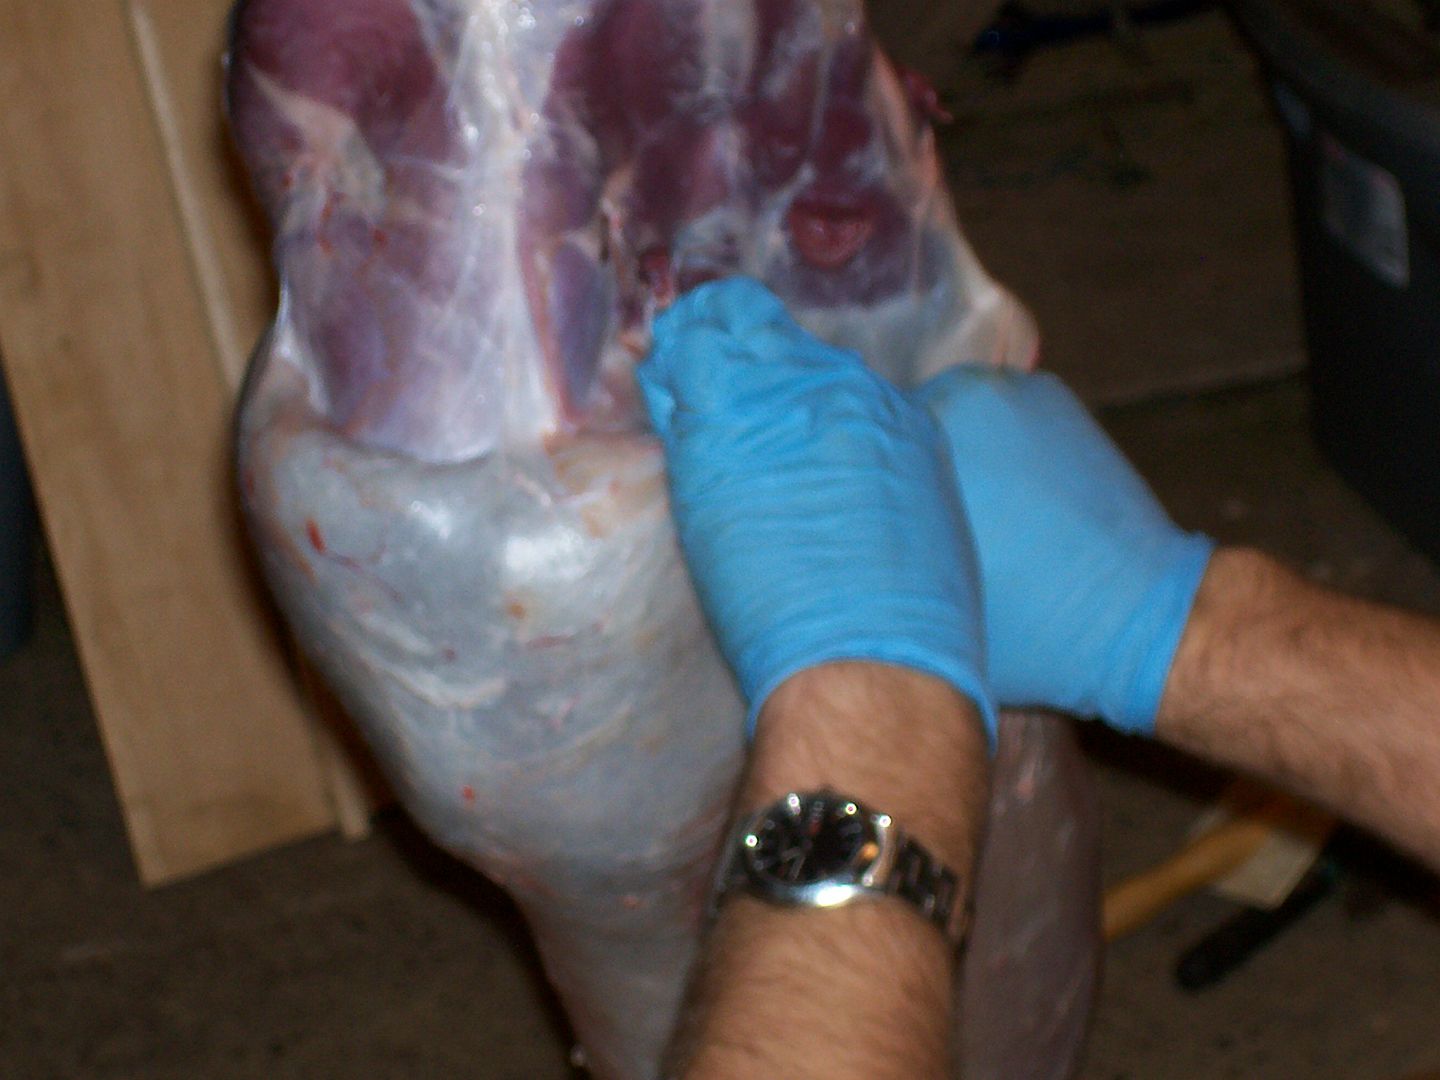
You can use a large screwdriver to insert between the body and leg and then pull down...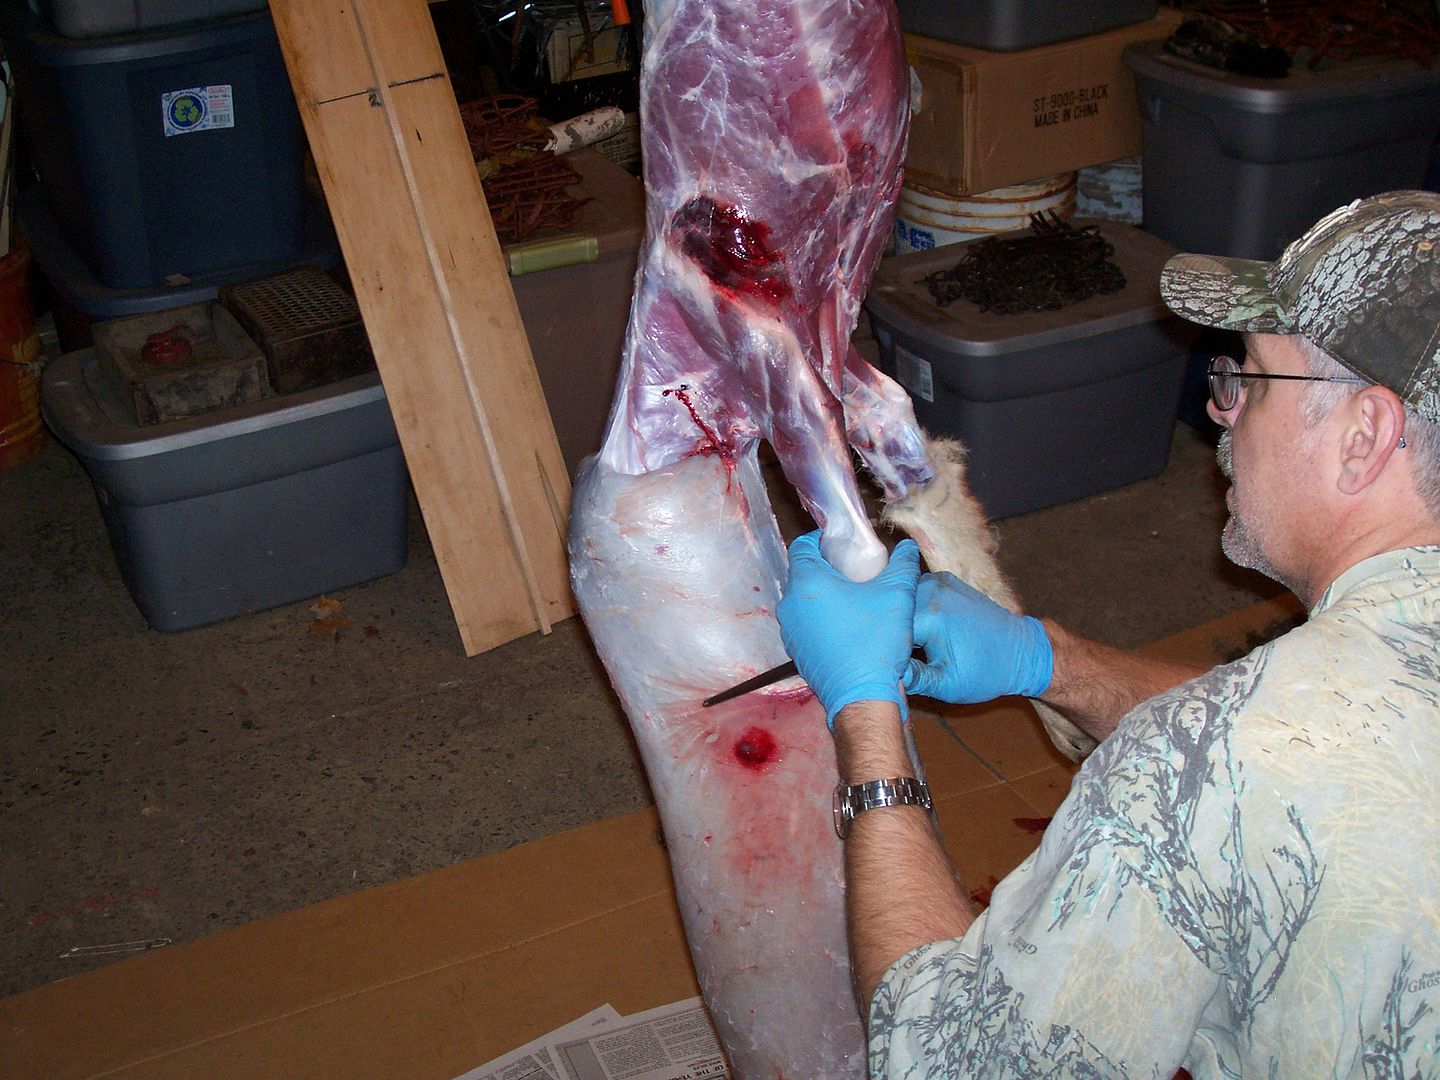 Skin down the front leg about half way, then cut through the fur and pull out the front leg.... Skin down the front leg about half way, then cut through the fur and pull out the front leg....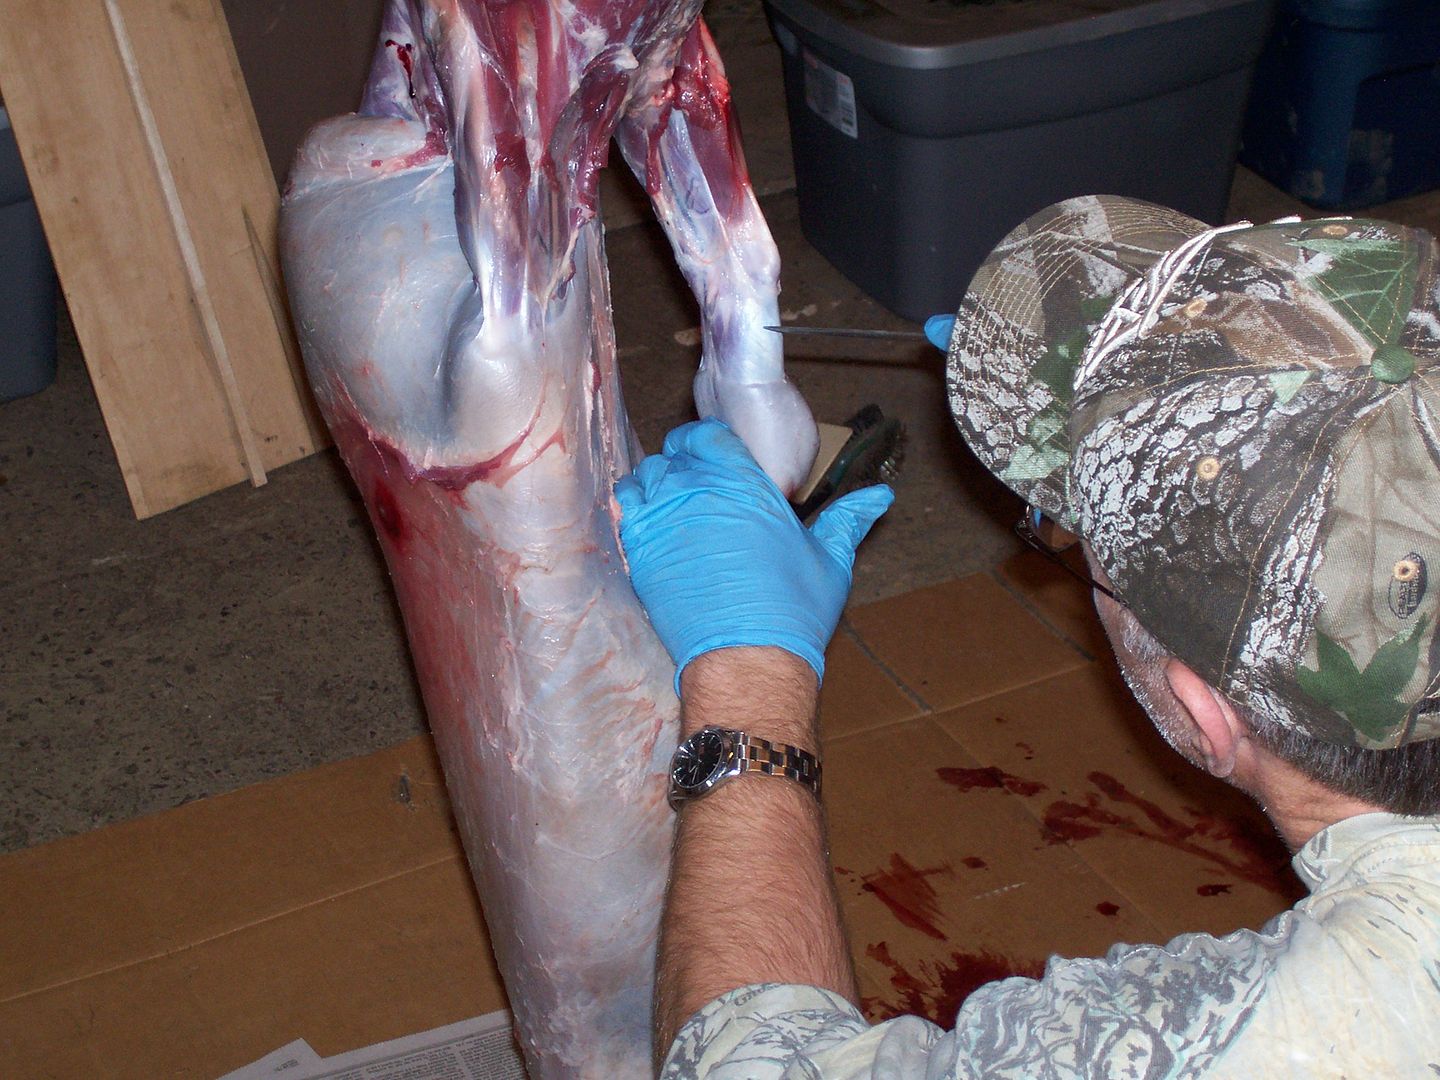 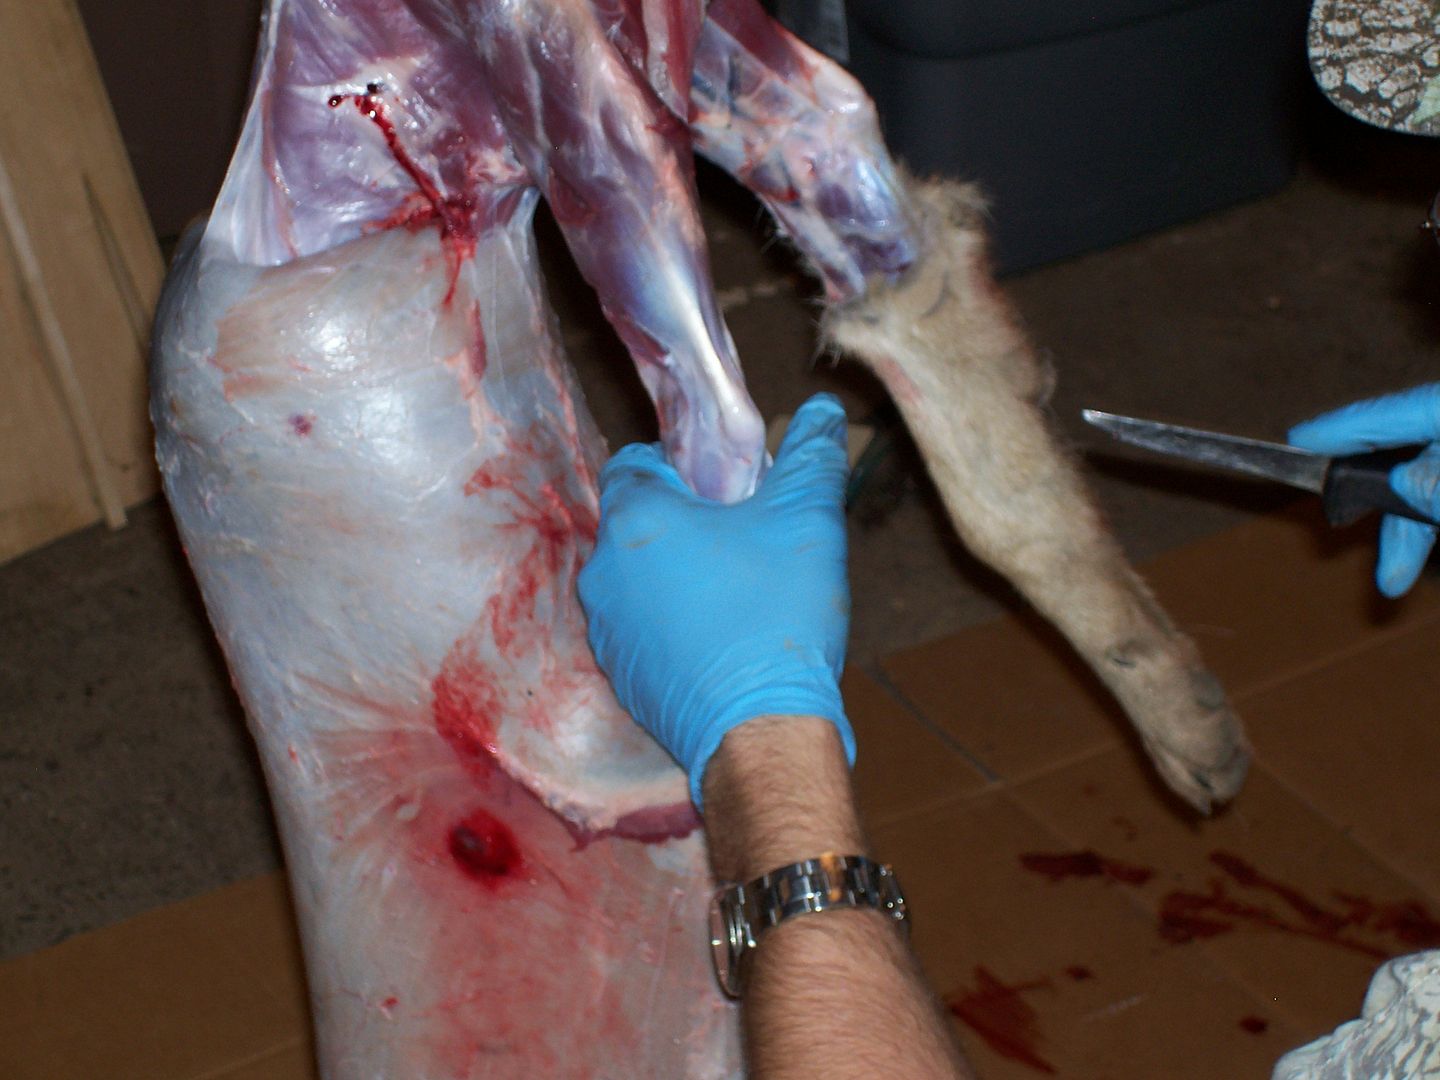
Skin down until you reach the base of the head & ears....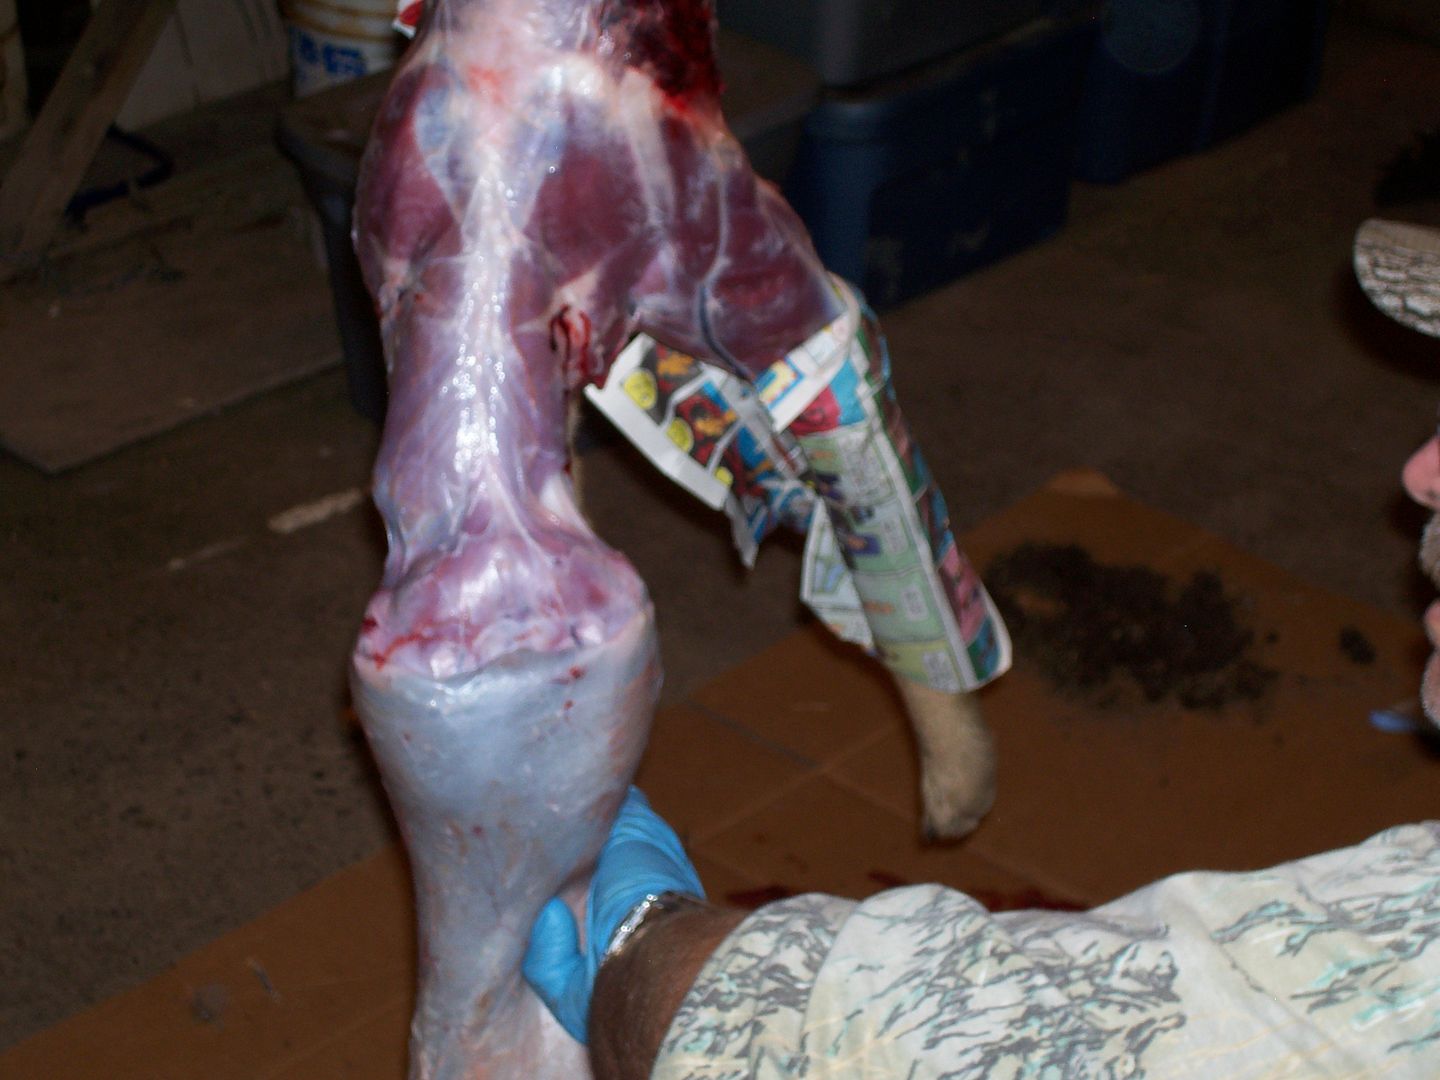
You'll want to cut the ear cartilage as close to the skull as possible...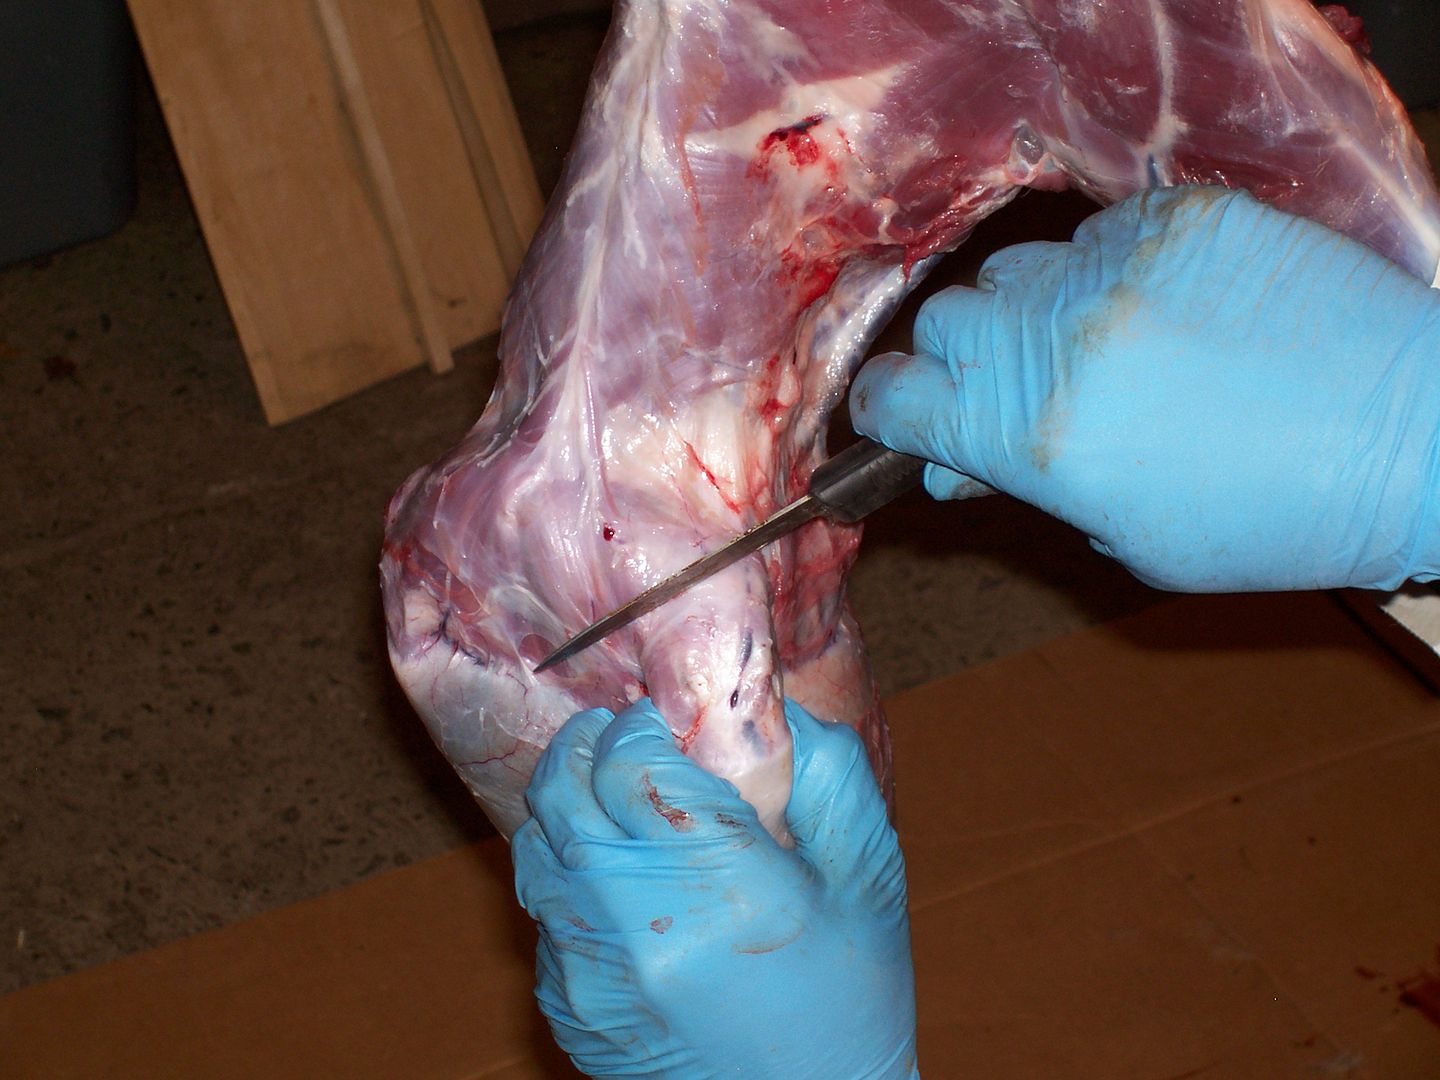
Next is the eyes, same way as with the ears, use your knife and cut as close to the skull as possible. You'll see the eyelids open up as you cut....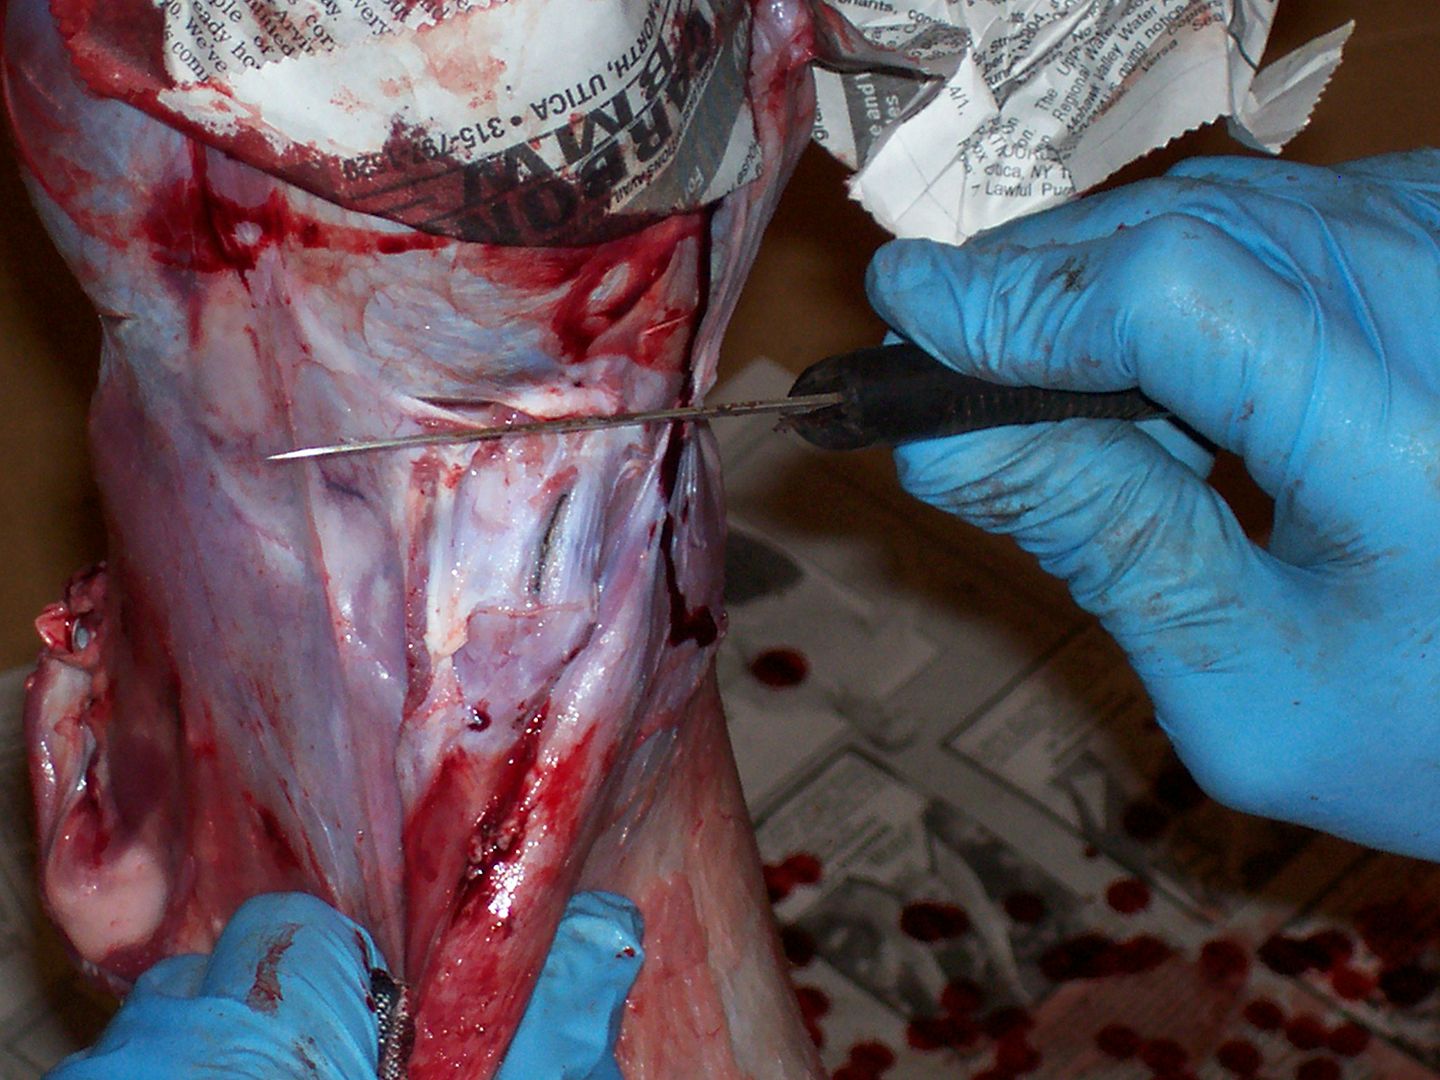
Next, I remove the excess meat and loose cartilage from the ears...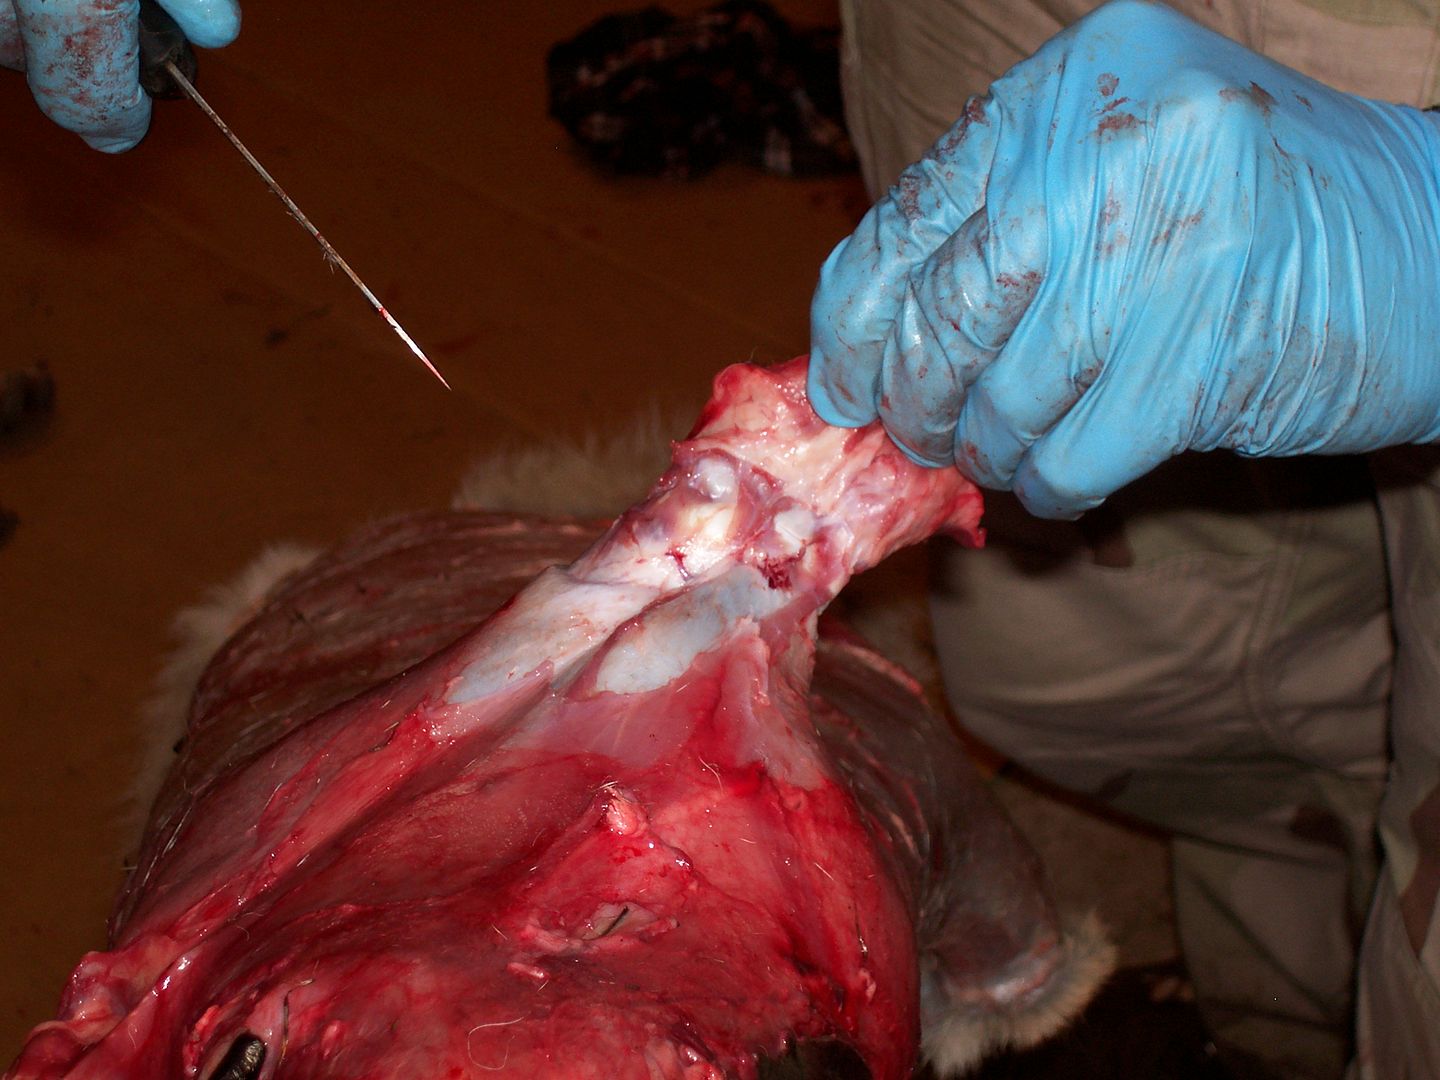 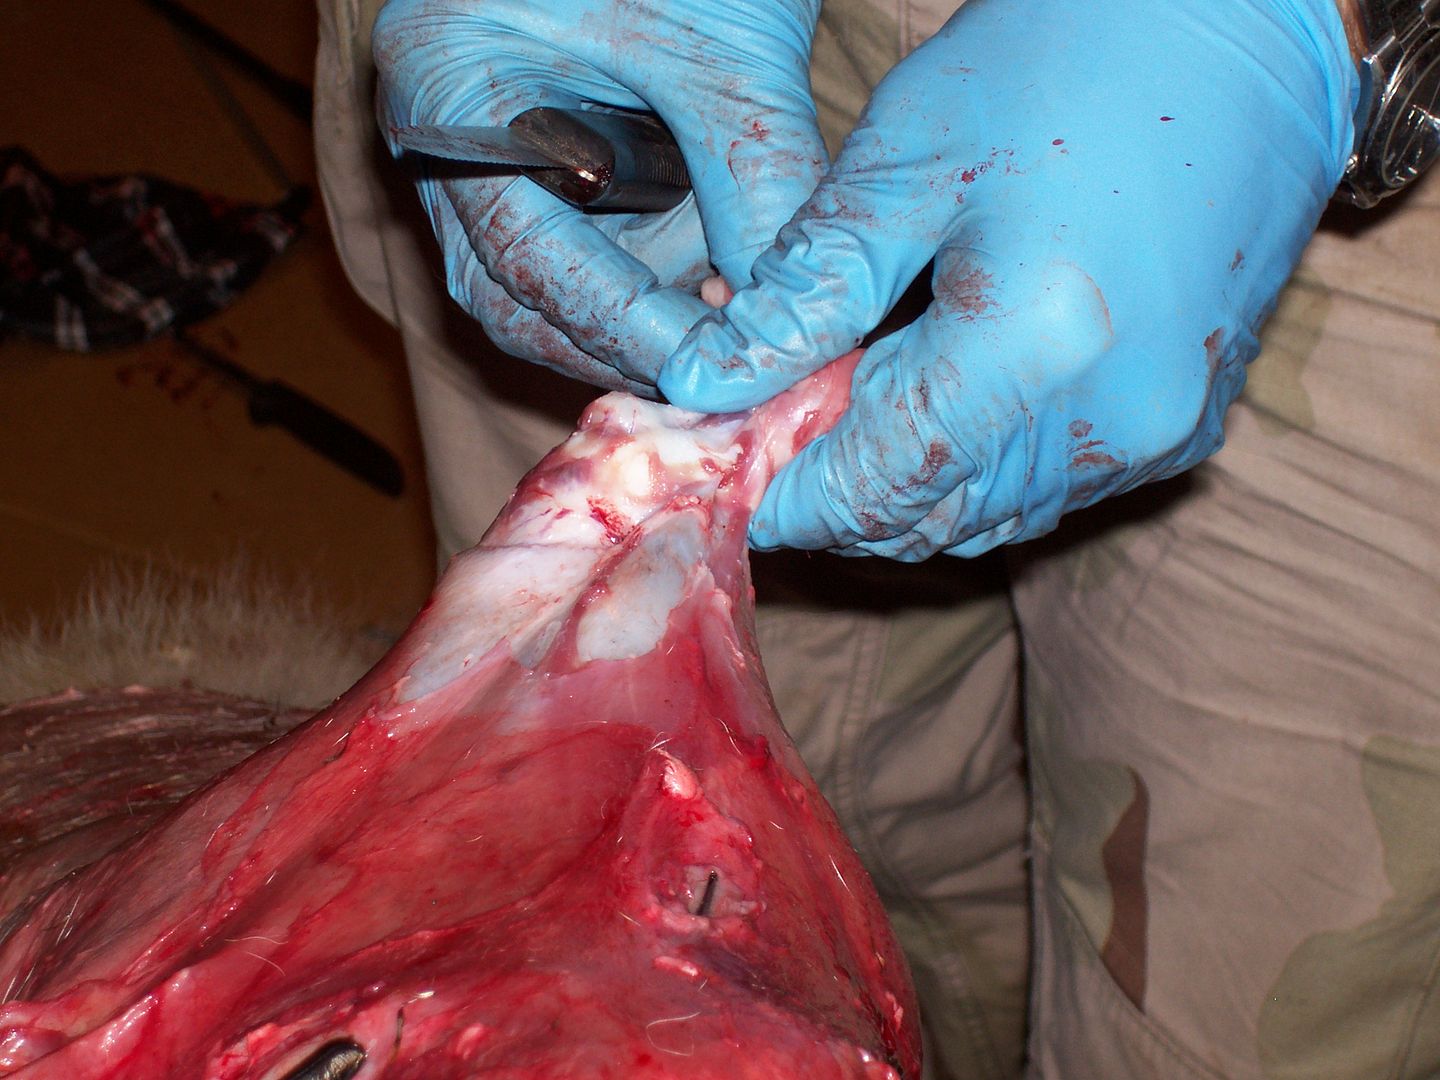 Here's the difference, the ear on the right is done, the one of the left isn't... Here's the difference, the ear on the right is done, the one of the left isn't...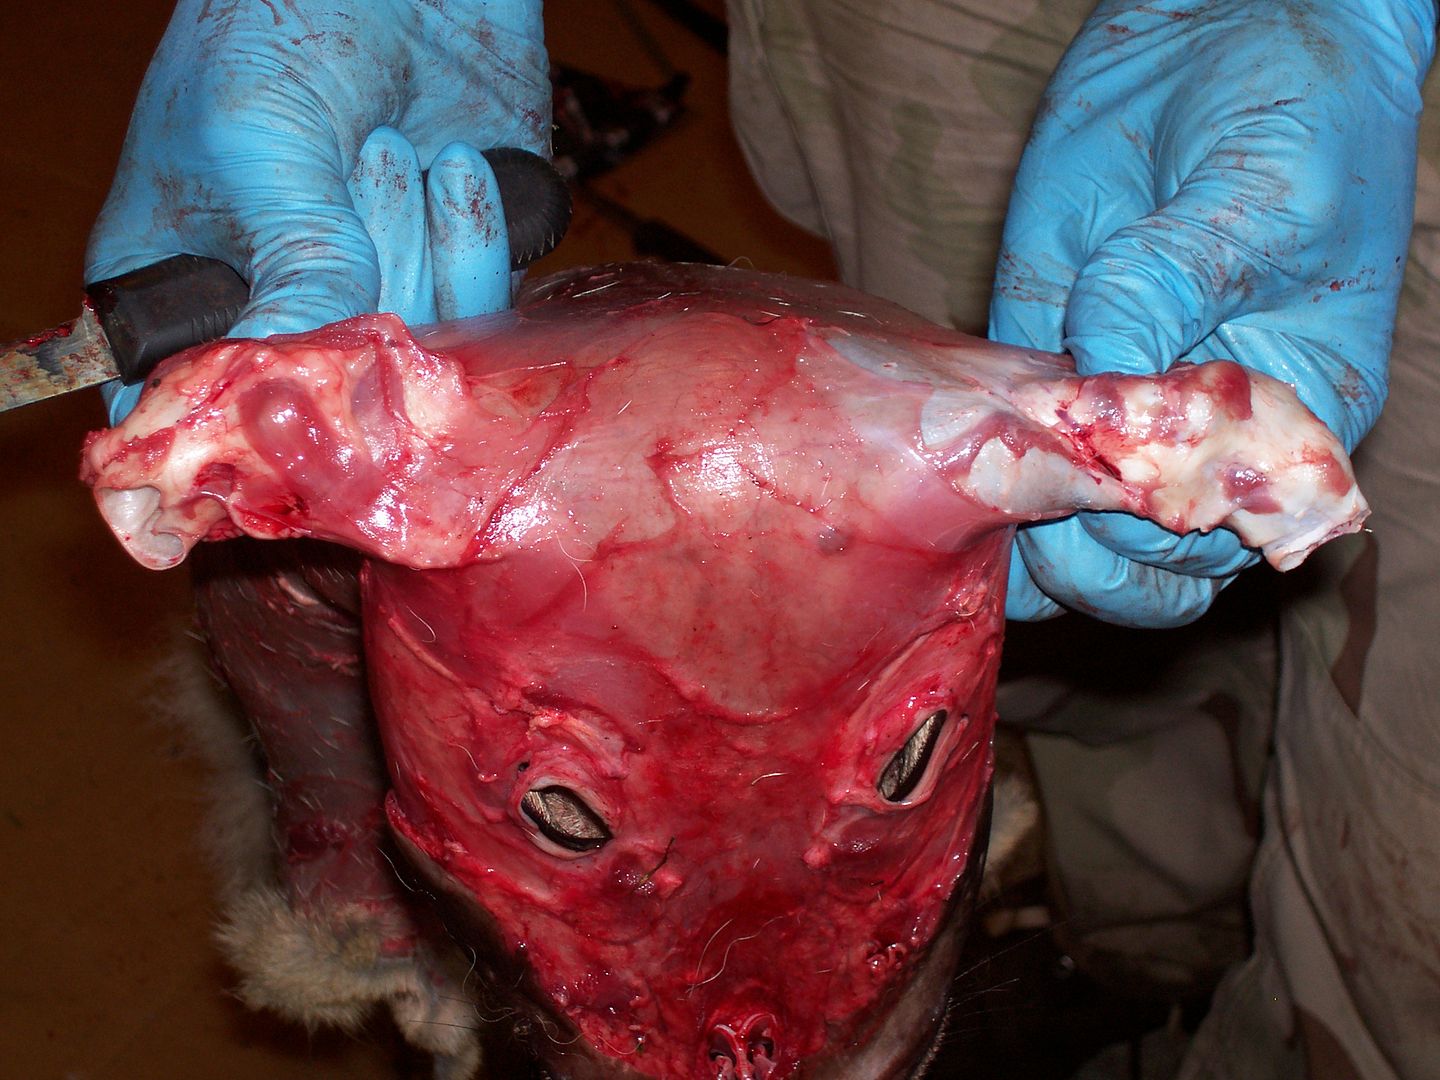 Make sure you remove all the burrs before starting to flesh! Make sure you remove all the burrs before starting to flesh! Start at the head and remove all pieces of flesh & fat, working your way down the pelt turning as necessary... Start at the head and remove all pieces of flesh & fat, working your way down the pelt turning as necessary...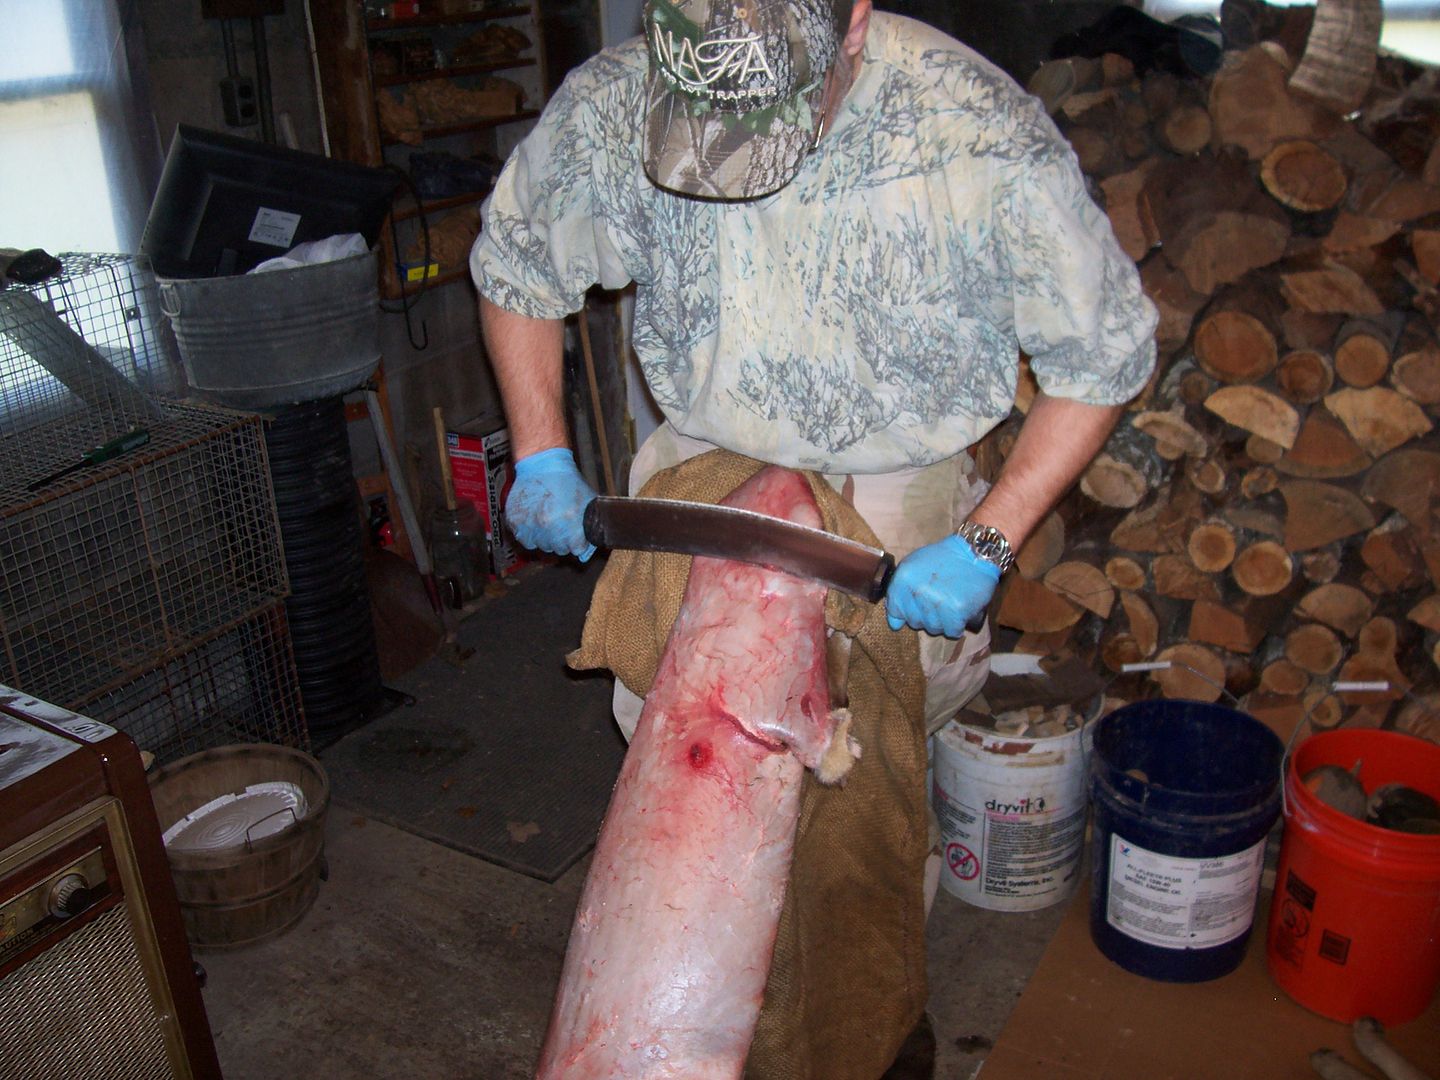 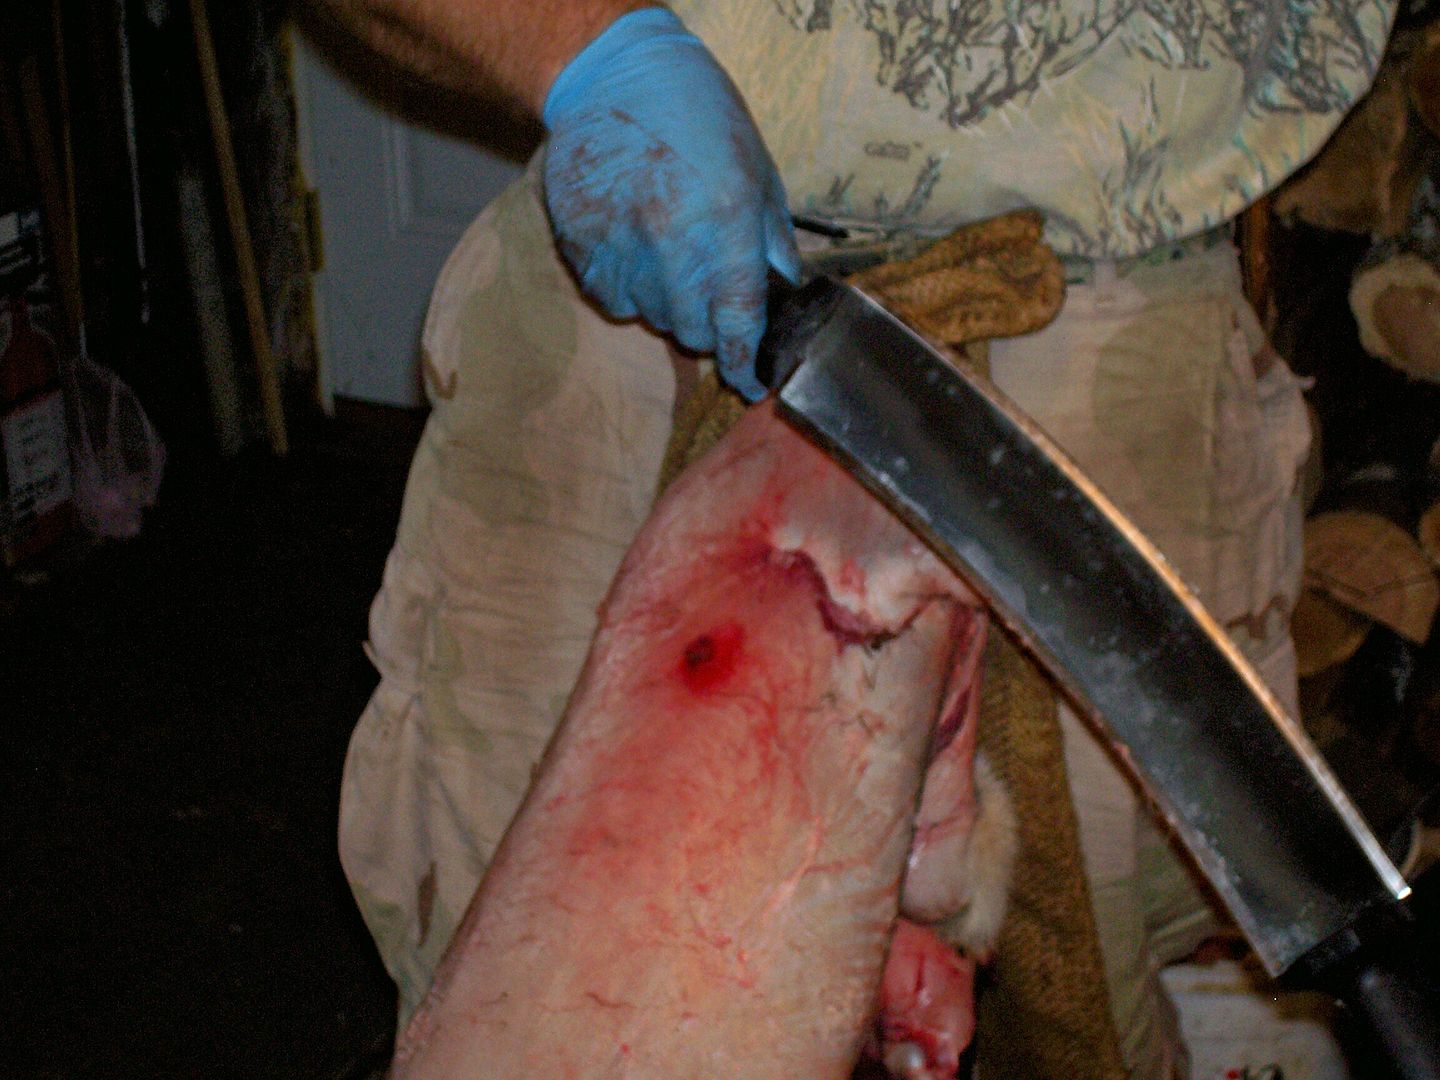 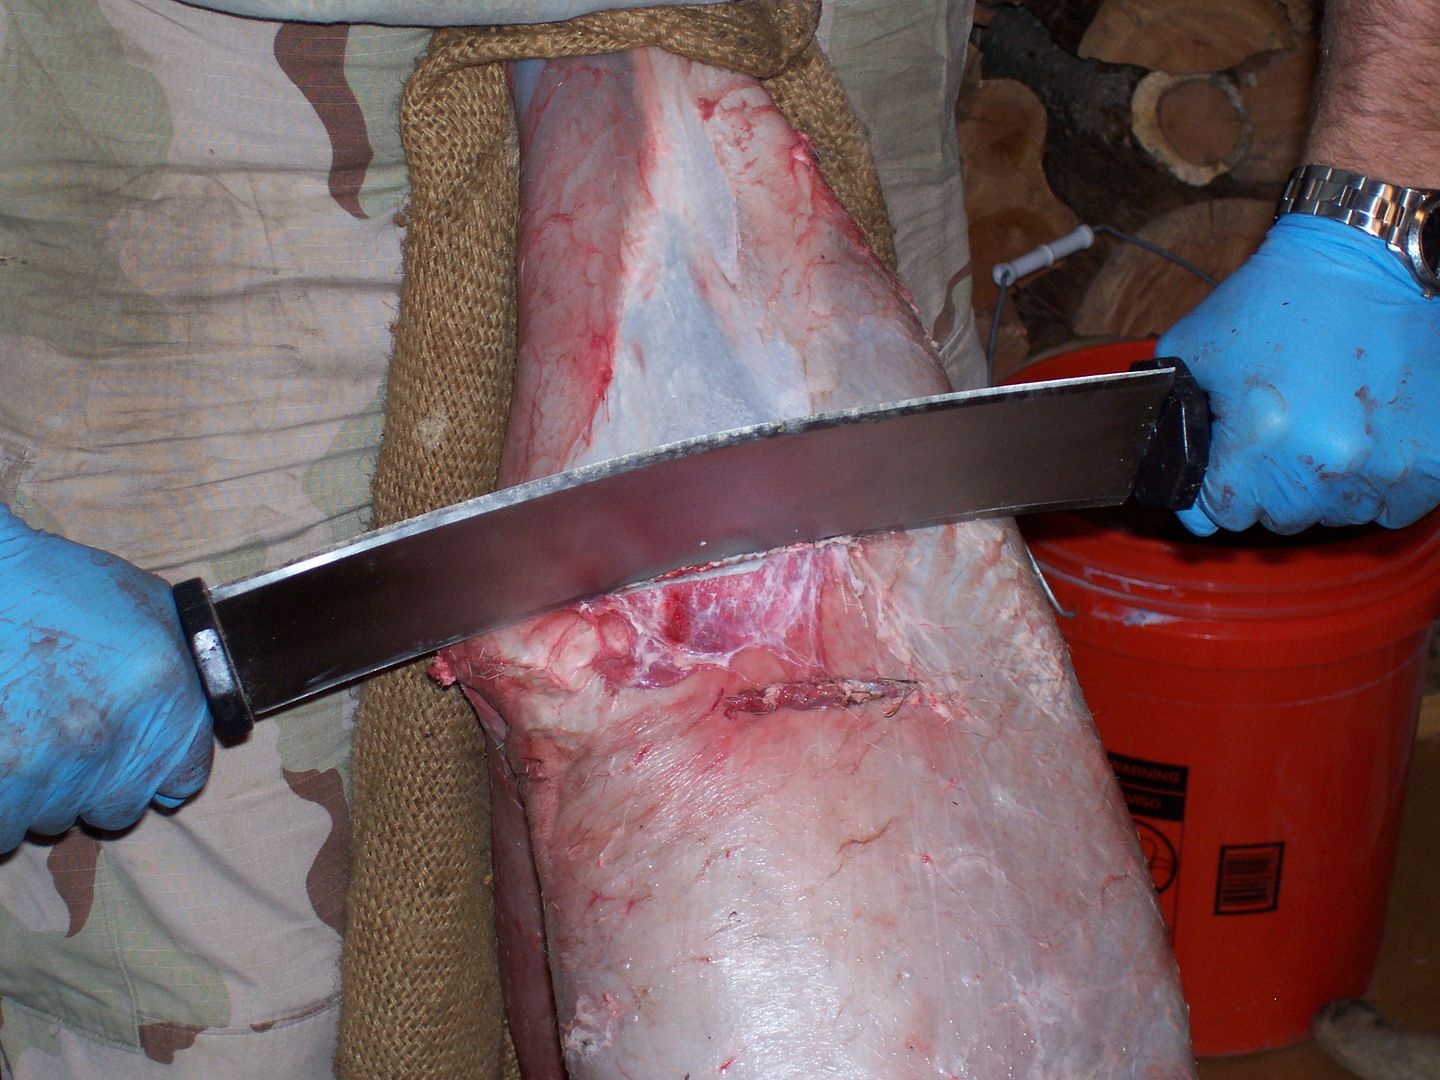 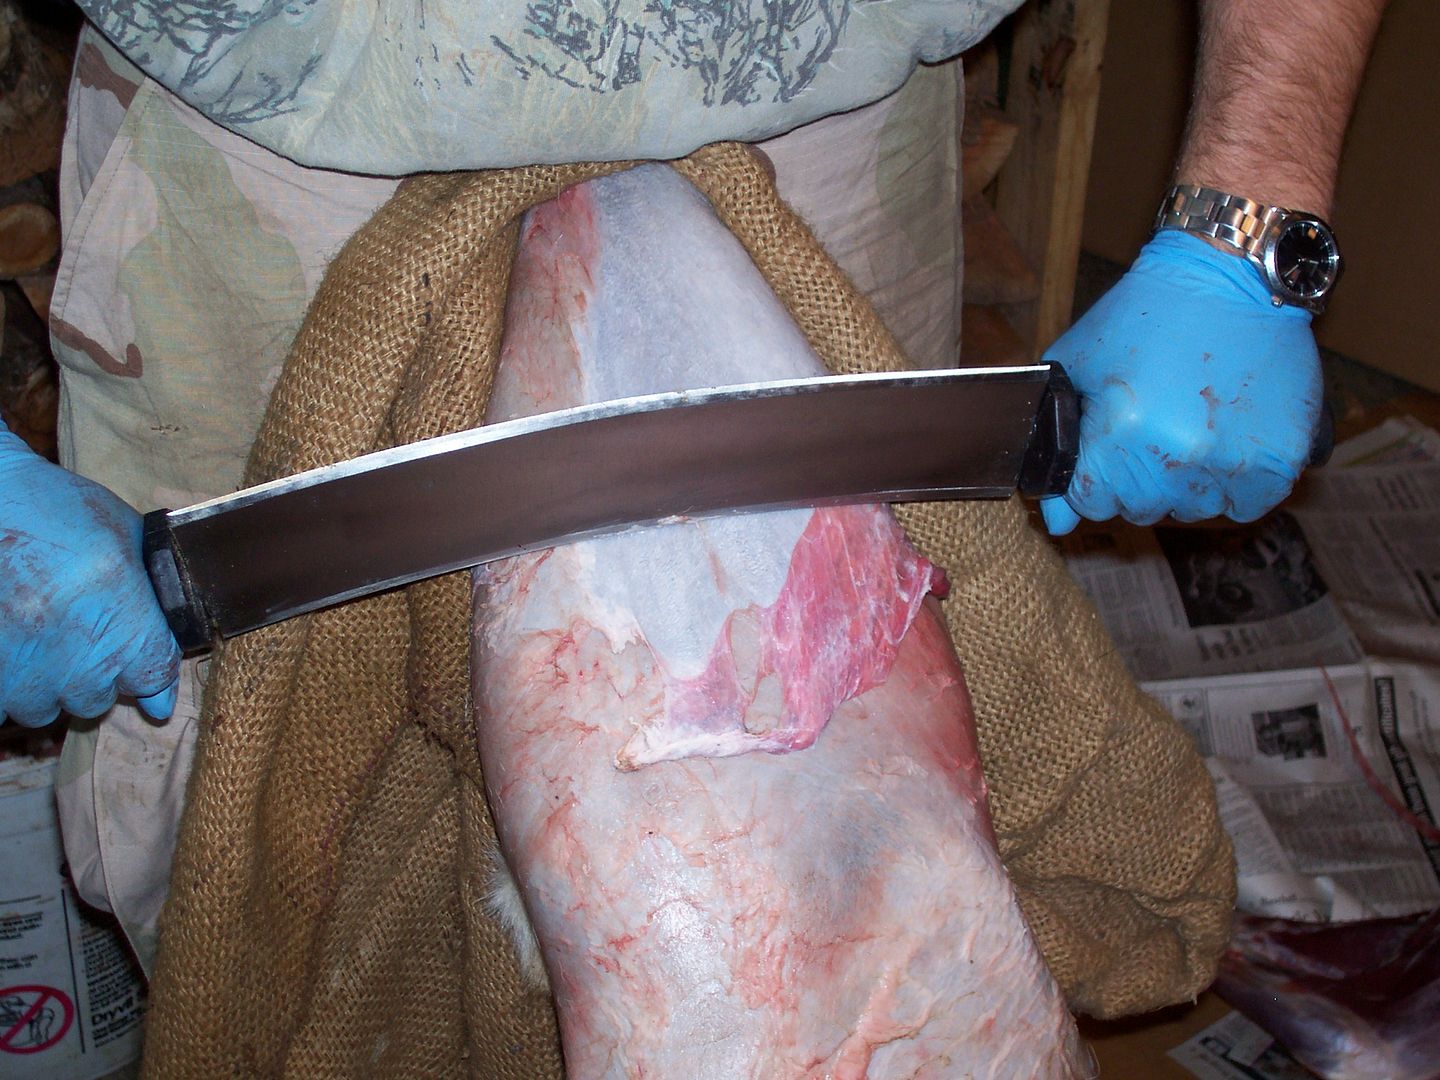 Make sure that you remove the fat between the hind legs on the belly side... Make sure that you remove the fat between the hind legs on the belly side...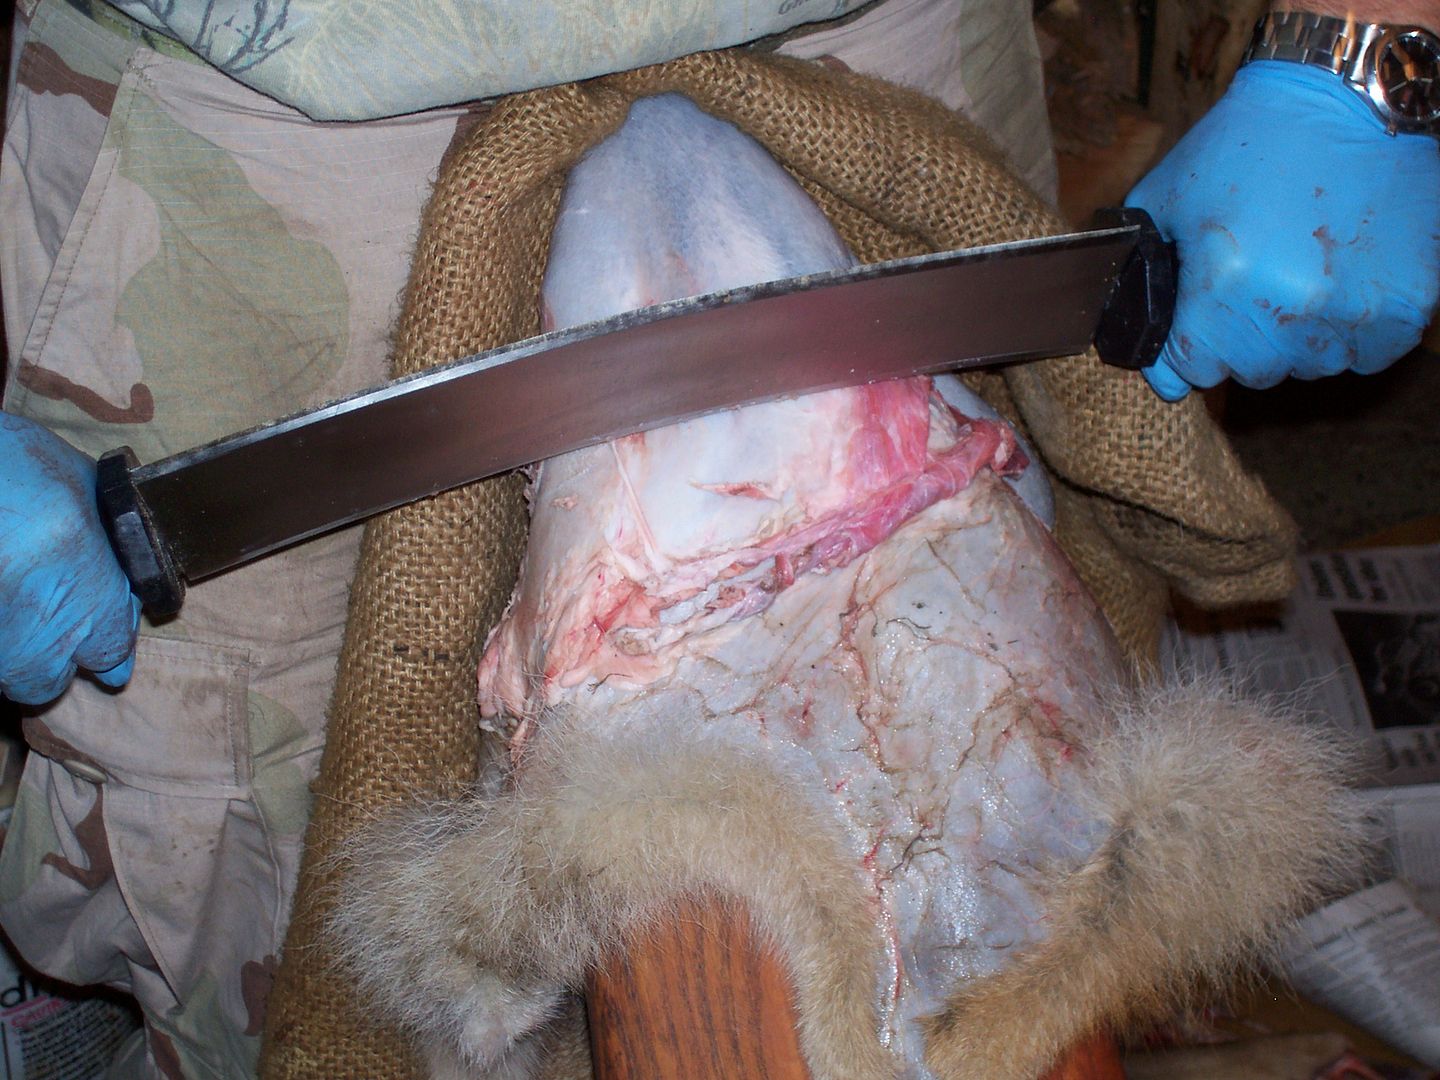 Make sure that you put the pelt on the board straight with the ears centered on one side and the front legs centered on the other.... Make sure that you put the pelt on the board straight with the ears centered on one side and the front legs centered on the other....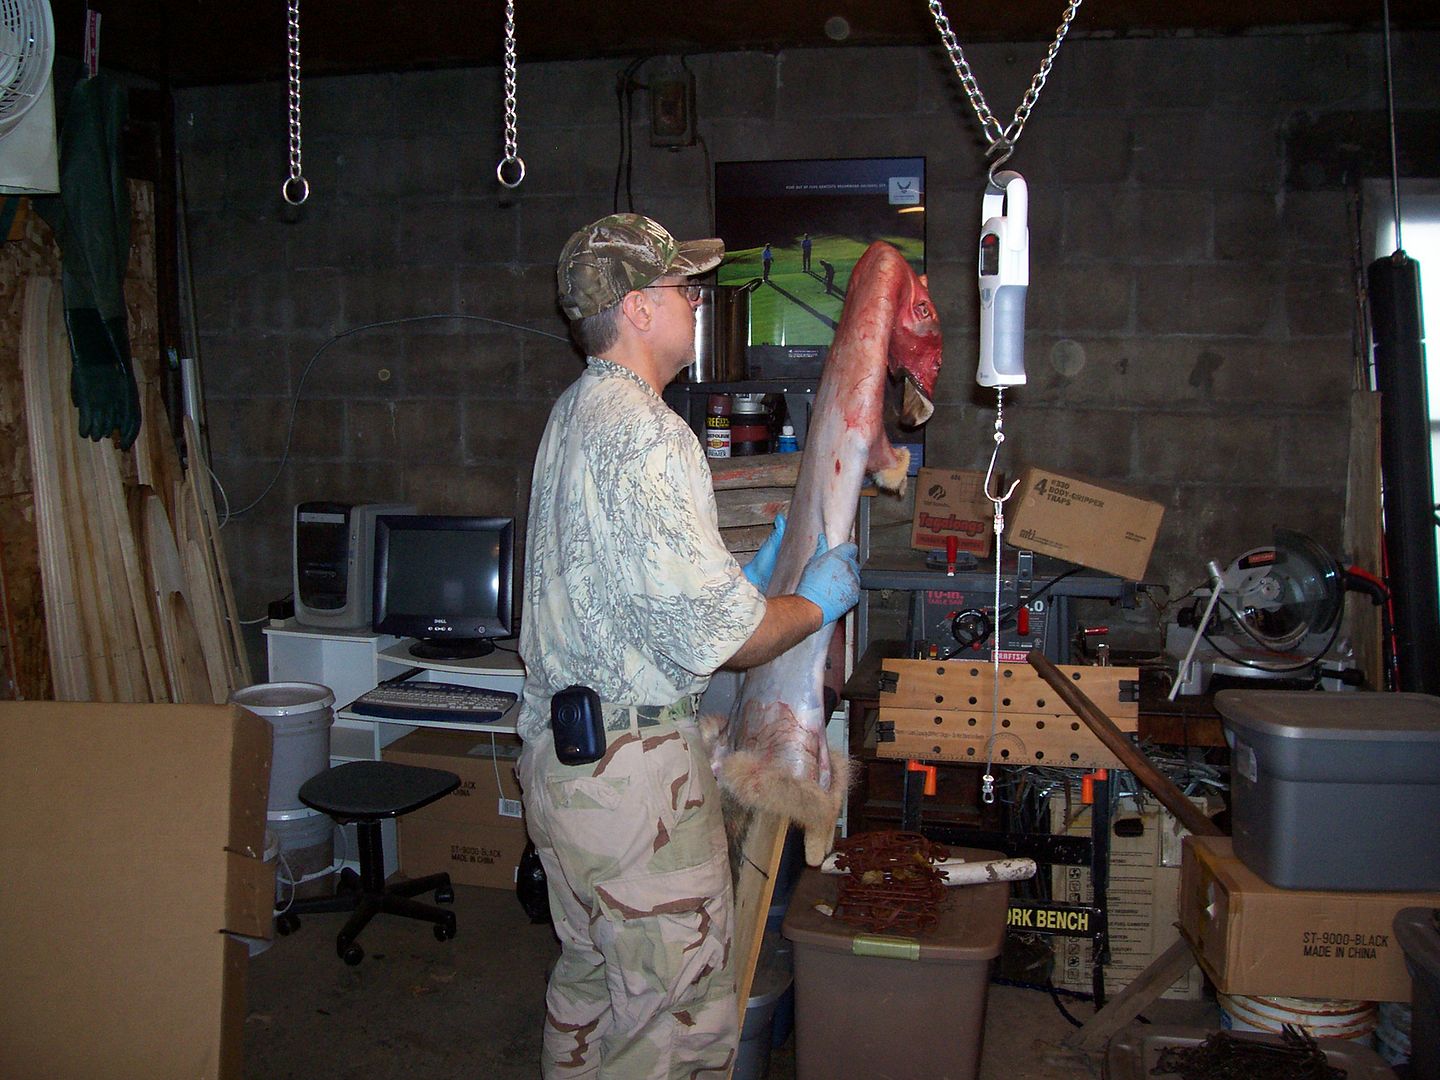 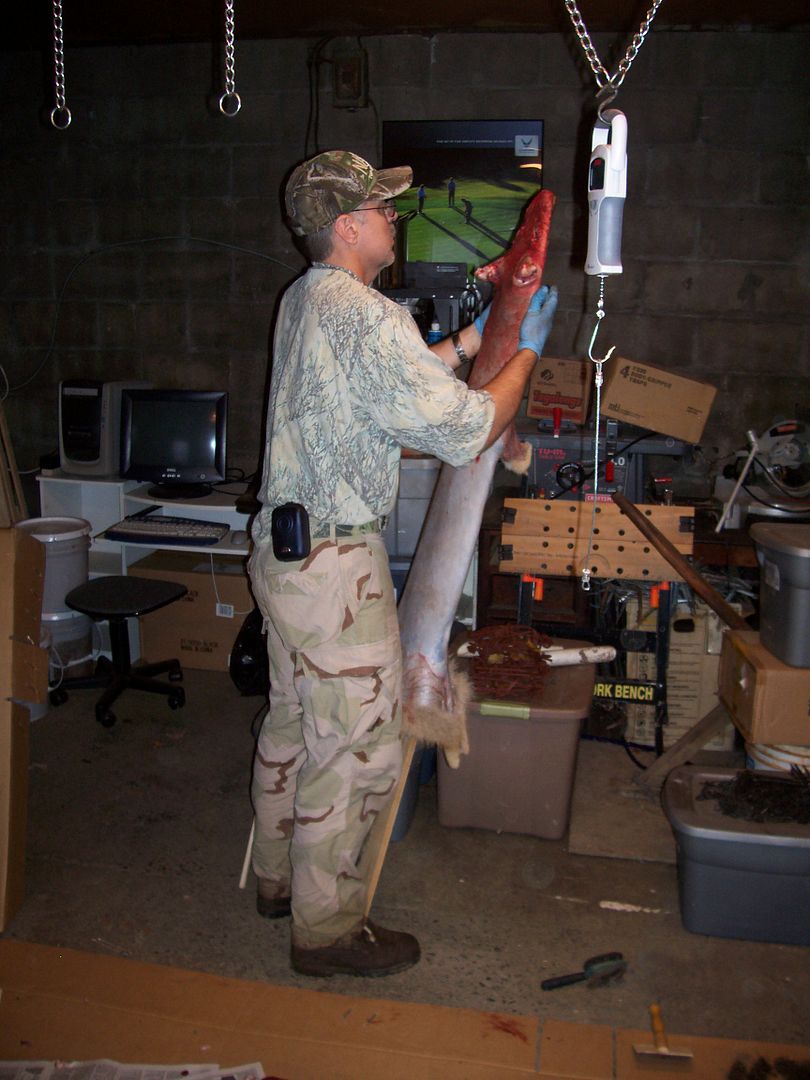 Make sure that you cut off the bottom lip... Make sure that you cut off the bottom lip...
Pin the tail open with at least 3 push pins on each side...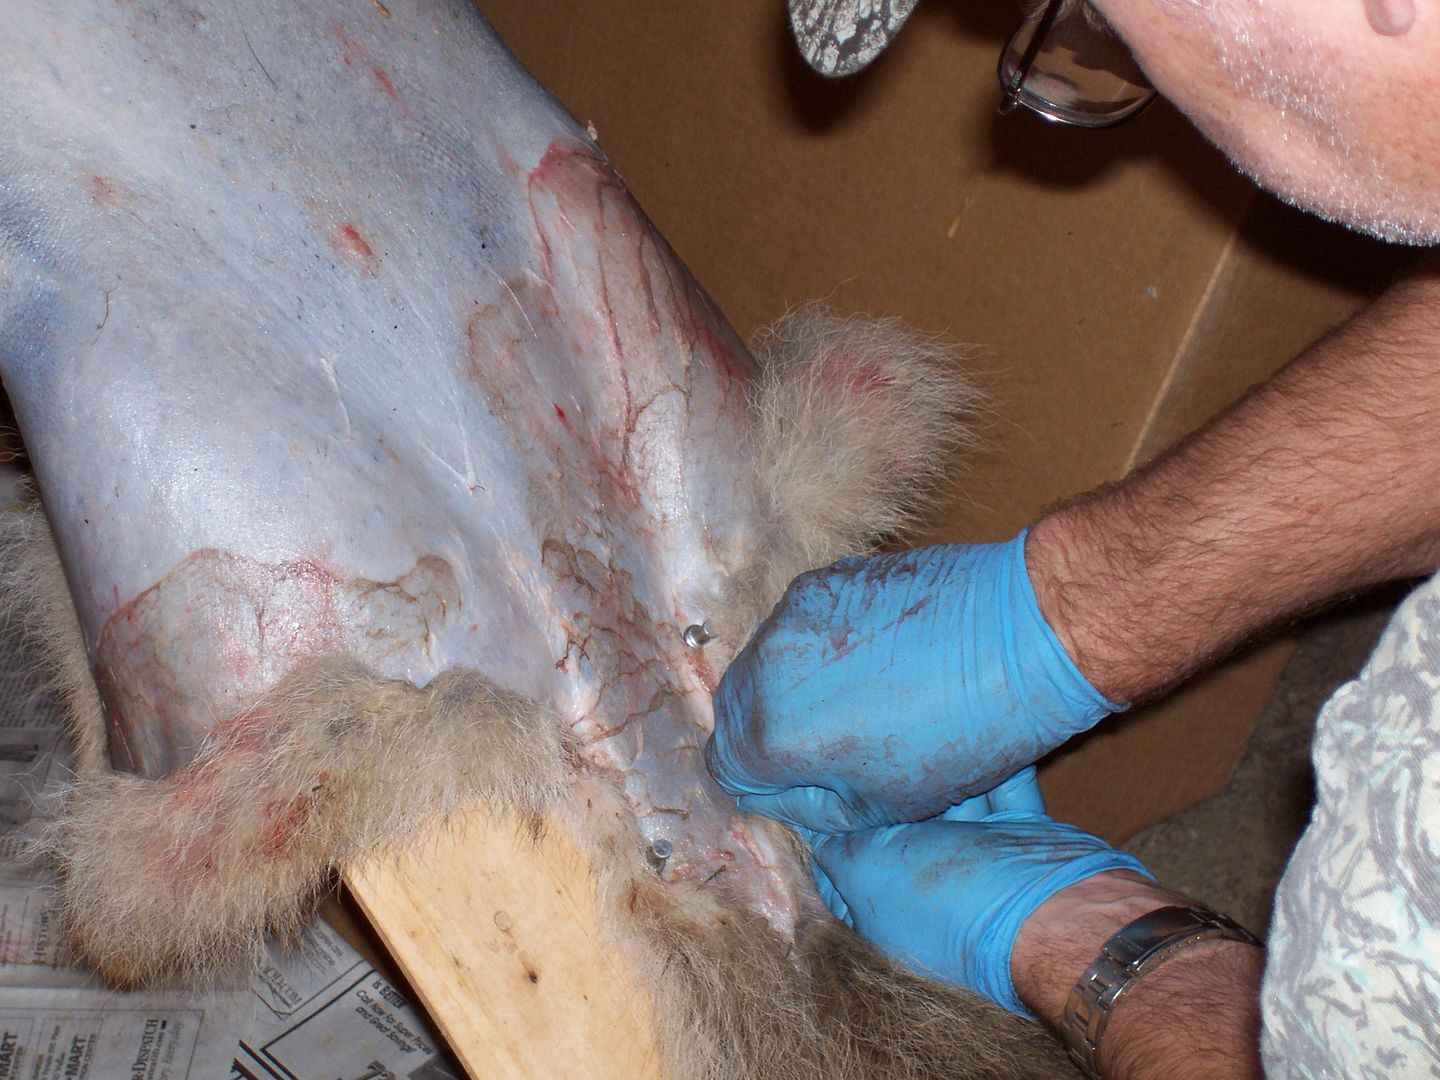 Tack out the hind legs keeping them even with each other... Tack out the hind legs keeping them even with each other...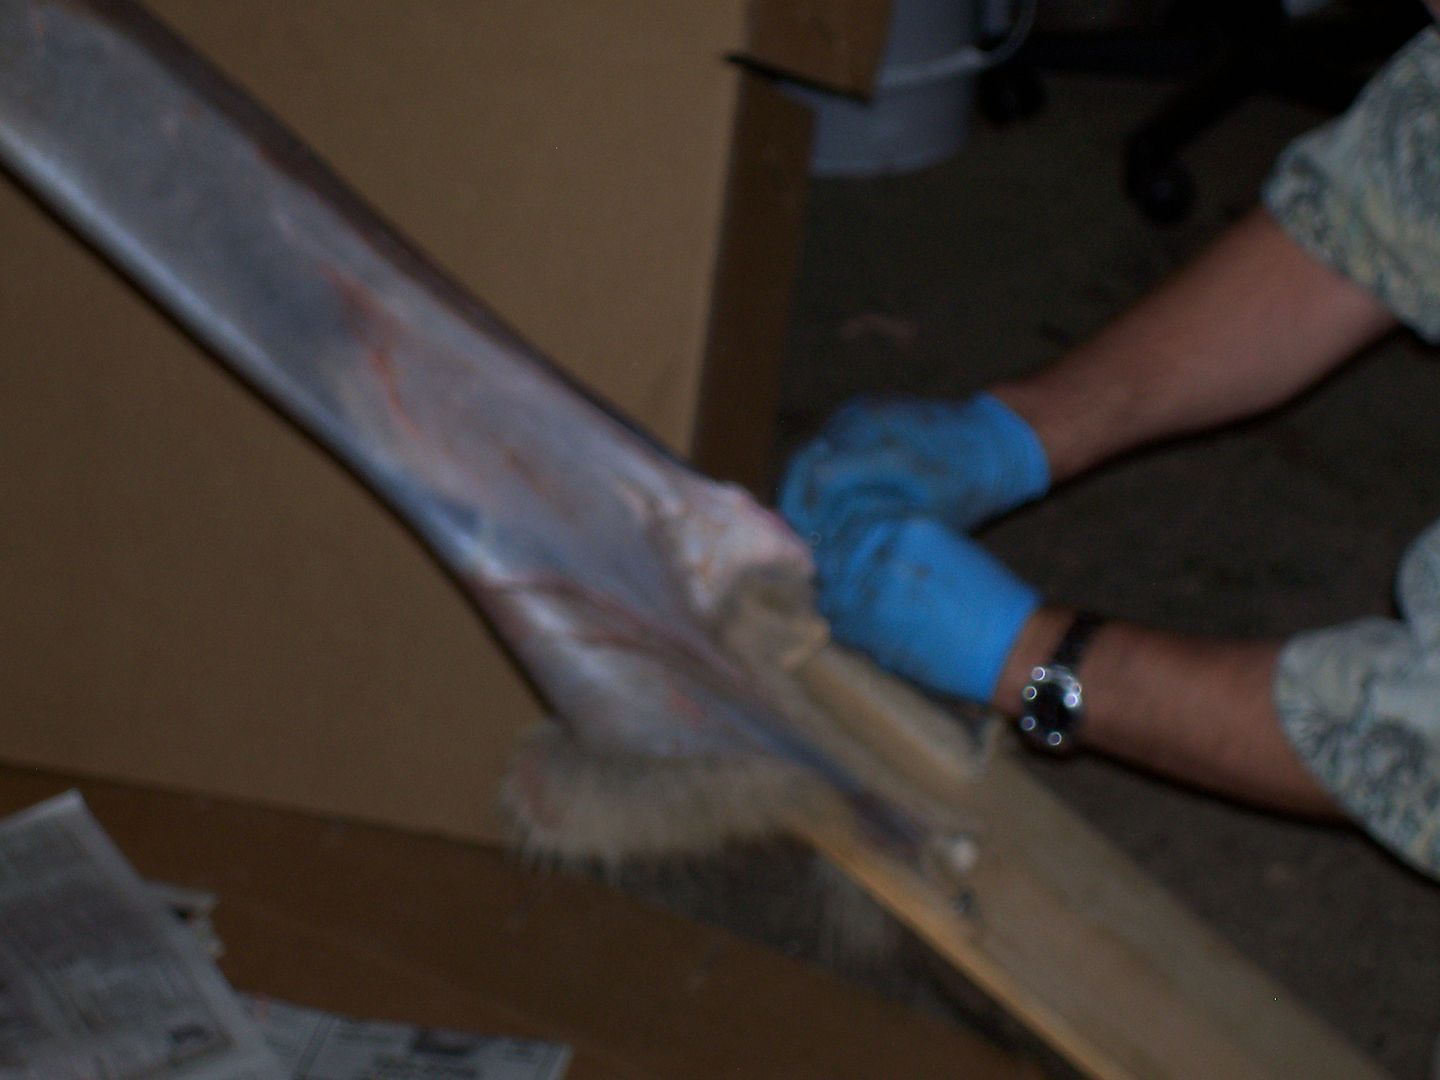 I borax the ears and the front legs so they dry quicker and won't spoil as easy... I borax the ears and the front legs so they dry quicker and won't spoil as easy...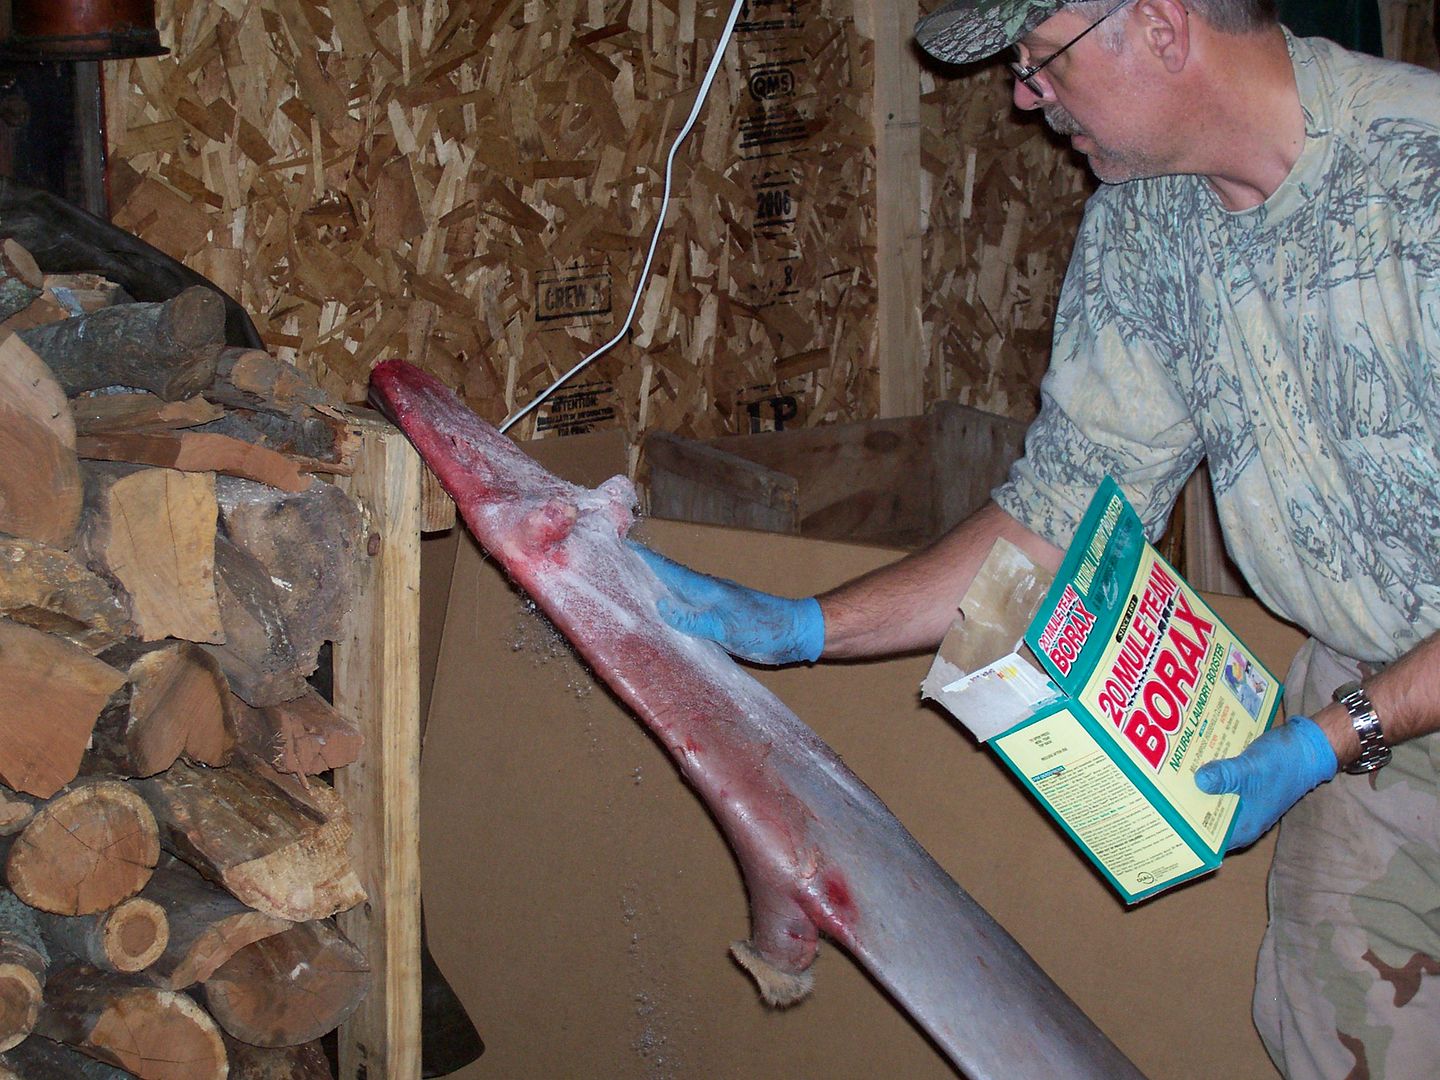 I hang my pelts nose down and will turn it fur side out when dry to the touch but still just a bit tacky... I hang my pelts nose down and will turn it fur side out when dry to the touch but still just a bit tacky...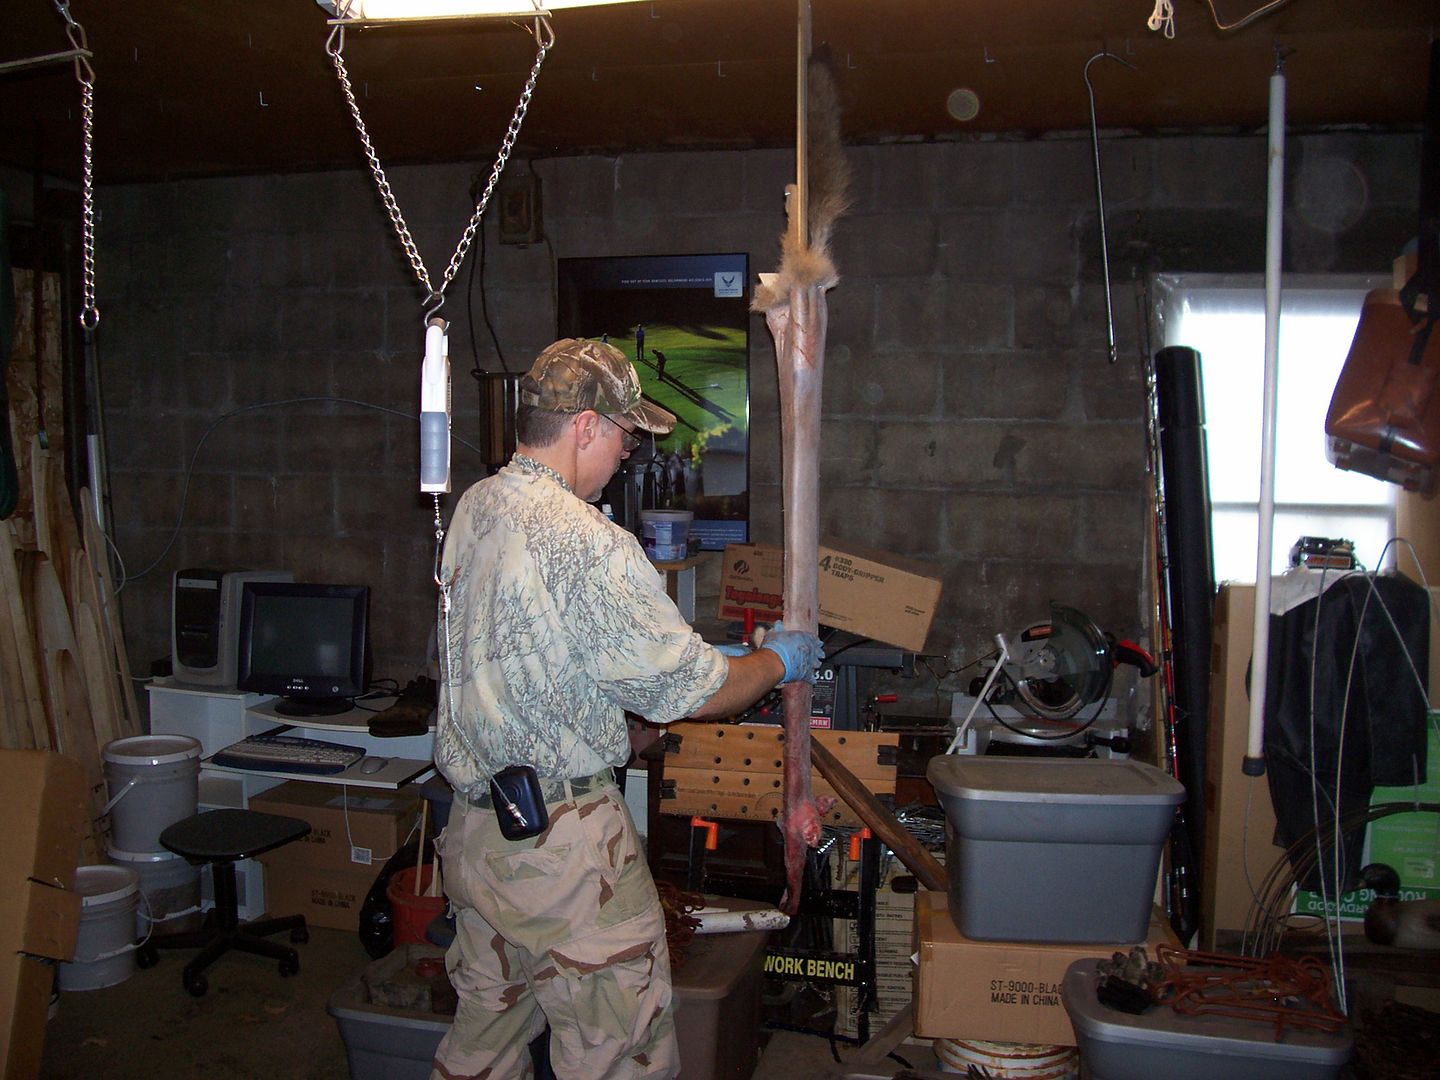 Hope this helped |
|
|
|
Post by ecgreen on Nov 1, 2009 17:03:43 GMT -5
Yes it did. Thanks!
|
|
traps82
#3 Newhouse
 Hope is always alive
Posts: 3,208
|
Post by traps82 on Nov 1, 2009 18:03:25 GMT -5
Excellent!! ;D
|
|
|
|
Post by brandonh on Nov 1, 2009 18:17:48 GMT -5
Great tutorial, Wayne. I like to cut the front legs off with a saw prior to skinning, as it seems to make life easier for me
|
|
Woj
#3 Newhouse
Posts: 3,381
|
Post by Woj on Nov 1, 2009 20:46:41 GMT -5
Thanks Wayne. Same thing I did with my fox. Just didn't know about the meat in the head area. Last year when I tried to remove it I put a couple of holes in the pelt that were not necessary.
This year, I boraxed the head and legs.
Thanks again-
Nick
|
|
Deleted
Deleted Member
Posts: 0
|
Post by Deleted on Nov 1, 2009 21:43:24 GMT -5
Great tutorial, Wayne. I like to cut the front legs off with a saw prior to skinning, as it seems to make life easier for me To make things a little simpler, cut from just above the bottom of the paw to the center joint on the front leg. When skinning down the leg, the paw pops right through, then one slice and the front leg is disconnected. |
|
Derek
#2 Newhouse
Posts: 2,099
|
Post by Derek on Nov 1, 2009 21:45:46 GMT -5
in about 10-15 years this will come in handy for me still no luck  , ill give it one month and then im done with trying to catch some yotes |
|
|
|
Post by Hawken315 on Nov 2, 2009 5:50:07 GMT -5
Great post wayne..and Derek I am sure you will get one,keep at it!
|
|
|
|
Post by trappermac on Nov 2, 2009 14:20:02 GMT -5
Great pic tutorial Wayne! Great fur handling!
|
|
|
|
Post by erict on Nov 4, 2009 21:26:15 GMT -5
Nice job Wayne.
One thing that is shown in your pictures but is not immediately obvious is how helpful it is to keep the actively worked part of the carcass at about eye/shoulder level while standing. Working the pelt off the carcass can be back breaking work, especially if you haven't done many. The leverage gained by working high makes a big difference, at least I think so.
I like to cut the tailbone off after it's skinned - seems like it ends up in the way too much if I don't.
I'm sure many appreciate your pics - thanks.
|
|
|
|
Post by hd56pan on Dec 30, 2010 11:25:43 GMT -5
Thank you,great instructions
|
|
|
|
Post by trapaddict on Jan 29, 2013 6:28:56 GMT -5
excellent thread, thanks for sharring.. this is my first popst.. i am going into my 3'rd year (apprentice  ) of trapping and fur handling.. i have followed my friend and his father around his trap line and helped out in the family owned taxidermy shop for many years ( maybe 15+) before i finally jumped in balls deep and started enjoying it for myself.. However, we have been on un-speaking terms for the last 2 years.. Questions for you Wayne: i have played around with several of the different "home" tanning kits ( TTI, Rittles, Johhny Thorpe), are there any kits that you prefer to use that produce a nice soft tan? i used to send all my coyotes to Keystone Fur Dressing, furs come back absolutely beautiful.. However, the better i get at trapping yotes, the more pelts i have been piling up, and Keystone is getting $84 for coyote tan ( fleshed and prepped)  thanks in advance and thanks for the pic tutorial.. Keep em coming!! |
|
|
|
Post by silverfox on Jan 29, 2013 8:07:48 GMT -5
excellent thread, thanks for sharring.. this is my first popst.. i am going into my 3'rd year (apprentice ) of trapping and fur handling.. i have followed my friend and his father around his trap line and helped out in the family owned taxidermy shop for many years ( maybe 15+) before i finally jumped in balls deep and started enjoying it for myself.. However, we have been on un-speaking terms for the last 2 years.. Questions for you Wayne: i have played around with several of the different "home" tanning kits ( TTI, Rittles, Johhny Thorpe), are there any kits that you prefer to use that produce a nice soft tan? i used to send all my coyotes to Keystone Fur Dressing, furs come back absolutely beautiful.. However, the better i get at trapping yotes, the more pelts i have been piling up, and Keystone is getting $84 for coyote tan ( fleshed and prepped) thanks in advance and thanks for the pic tutorial.. Keep em coming!! ive been doing my own tanning for bout 15 years (hobby taxidermist) for soft suptle tan the best ones ive found are either the Lutan-f with saftee-acid (wasco carries) and more recently ive been using the mckenzie brush on tan with great results, just finished a coon and beaver skin this past week, both are a nice soft white leather, when mounting the Krowtan works well as does the mckenzie (just dont oil the hide if mounting) |
|
|
|
Post by bmtrapper on Jan 29, 2013 15:18:41 GMT -5
Great pic .the work around the ears is always in question for me ,your pic are very clear thanks
|
|
|
|
Post by crabbait on Jan 29, 2013 19:57:57 GMT -5
Thank you, tutorials like this are greatly appreciated.
|
|
|
|
Post by Itrapny on Jan 31, 2013 17:53:37 GMT -5
Whenever I have fur tanned I use tannery in New Jersey called Tubari....great prices and have always been satisfied. www.tubariltd.com/Redbonechick on the Forum here also does tanning and has great prices and good work |
|
catman4
 If your to busy to hunt & trap then your to busy...
Posts: 745
|
Post by catman4 on Mar 13, 2013 18:46:13 GMT -5
Nice going Wayne pic's are clear thankyou......
|
|
|
|
Post by bluetickboy on Oct 27, 2013 5:25:39 GMT -5
Thanks! That was great. I'm gonna practice a little this year and set up to do it next year.
|
|
|
|
Post by dugzup on Dec 20, 2019 0:40:52 GMT -5
Why can't I view the pictures of the tutorial??
|
|
tmc
#2 Newhouse
Posts: 2,447
|
Post by tmc on Dec 20, 2019 18:21:09 GMT -5
Must be a problem with the site, maybe photobucket again. It's not just you, it's pretty much everything.
|
|


 , ill give it one month and then im done with trying to catch some yotes


 ) of trapping and fur handling.. i have followed my friend and his father around his trap line and helped out in the family owned taxidermy shop for many years ( maybe 15+) before i finally jumped in balls deep and started enjoying it for myself.. However, we have been on un-speaking terms for the last 2 years..